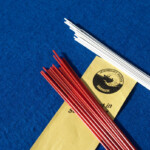
Bristle or Matchstick booms, as they are also known, provide an excellent means of keeping multi-hook, light line beach and boat rigs tangle free says David Proudfoot. Here he reveals the rig-building tricks necessary to make the most of these handy lengths of inexpensive plastic.
Bristle or plastic matchstick booms have been extensively used by Dutch and Belgian anglers for donkey’s years, but other than among a few shore match anglers they are not that common across the rest of Europe’s beaches. These cheap and simple stand-off booms provide a very effective tangle-free rig especially when using low diameter snood lines on light scratching rigs. The bristle booms also have an inherent springing action when under tension which helps imparts more natural movement to baits than most wire boom alternatives.

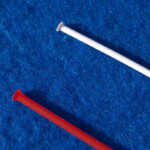
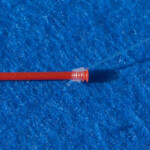
The bristle booms are basically nylon brush bristles and can be sourced simply by dismantling a hard yard brush head bought from a DIY or hardware outlet. One brush contains material for many hundreds of booms. Alternatively packets good quality bristles (matchstick booms) can be obtained mail order from UK-Hooks based in the Isle of Wight. The alternative name of matchstick boom alludes to the narrow diameter of the material. These come as plain nylon rods in two diameters and colours; in lengths of approximately 280mm. As with most other booms the anglers in Belgium and the Netherlands have a much larger selection of lengths, diameters and colours available to them and pre-tied traces are also available in their tackle shops.
In order to use the bristles in a rig they must first be prepared by forming a blob on each end. This is simply done using a non-flame heat source such as a soldering iron. An iron or electric cooker ring can be used but there is a chance that the nylon will damage the surfaces of these appliances. Holding the boom perpendicular to the heat source, gently press the rod against the surface until a small blob forms – but BE CAREFUL because the plastic has a tendency to slip as it softens and it is very easy to burn your fingers.

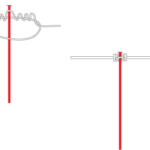
This blobbed/mushroomed end is for the purpose of locking the boom in a four or five-turn blood loop knot in the rig body so that it cannot pull clear. Next blob the opposite end of the bristle to form a lip that the snood knot will securely buffer against.
Putting the Boom Rig Together
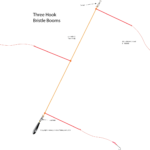
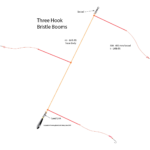
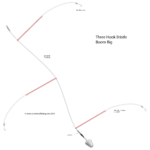
To build the rig a lead link first is tied to the bottom of the trace length and a swivel to the top. The length of the trace is dependant upon how many booms you wish to use.

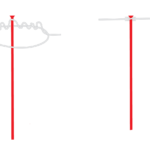
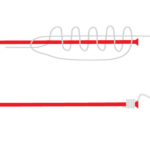
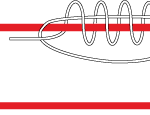
To attach the first boom wind the line around itself to start to form a blood loop, but instead of threading the loop through the middle of the turns you have formed, slide the boom into place. Now wet the line and pull on both ends of the trace body either side of the bristle until the knot snugs up neatly on either side. Repeat these steps for the remaining booms.
Snoods can then be attached using a snell knot or knotless knot. You will need to leave a long loop if tying the snell knot in order to allow it to pass over the end of the boom. Again make sure the knot is lubricated before tightening fully.
An alternative to trapping bristles in blood loops is to utilise an appropriately sized two-way bead. The boom must be pushed through the bead before the ends are blobbed. The finished beaded booms are then held in position on the rig body using double overhand knots, glued stops or crimps.

Fiting Swivels
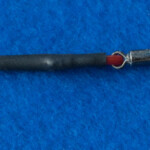
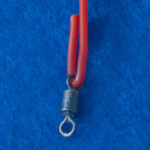
A swivel can also be used to replace the knotted snood; this is particularly advantages if fishing for the likes of common eels or pouting which are inclined to spin and make a real mess of rigs that do not incorporate swivels. The swivel should be kept as small as possible to reduce weight on the end of the boom. By heating the end of the nylon boom and gently pulling with pliers the rod can be stretched, reducing the diameter and allowing a small swivel to be used. Before working with the swivel slide a short length of tight-fitting silicon tube, low temperature shrink, or a tapered rubber crimp cover onto the boom; this will come into play at the next stage for the purpose of securing the swivel in place.


To fit the swivel, simply heat the end of the boom with a hairdryer, or a give it quick blast hot air gun (but take care not to melt it completely). As the bristle softens, carefully bend perhaps a little less than 2cm back towards the longer part of the boom so that it lies parallel. Pop the swivel on and work it into the correct position. Now squeeze the folded and main part of the boom together -using pliers if necessary – and push the tubing towards the swivel – I normally use a cut down Greys Prowla crimp cover for this purpose. The tubing can be pushed right onto the back of the swivel if desired, but the most import thing is to ensure that this end of the boom is securely closed so that rubbing on the seabed, or a fish cannot spring it open.


