More and more anglers are converting to using glued stops and two-way beads for rig building. Here we walk you through the materials required and the simplest method of producing these shore and boat rigs.
Glued rig stops in conjunction with two-way beads can produce very neat and unobtrusive snood junctions for DIY rig builders. They are particularly effective when using two-way or cross beads for clear water venues or smaller species. Unlike badly applied crimps they do not pose a risk of damage to the rig body, as long as you use a suitable glue. Traces made using the glued stops are generally quicker to produce and neater than those using silicon stops, Powergum or telephone wire.

Glued tubing and two-way beads produces a neat rig
However, the glued stops are not moveable, once in place they are fixed for good.
Materials for Two-Way Bead Glued Rig Stops
The choice of glue is important, some brands or products harden to a solid, brittle finish which can affect the monofilament or fluorocarbon line. Two glues that I recommend are the Tronixpro Top Fishing Rig Glue and Loctite 406. Both of these bond perfectly with silicon tubing and monofilament or fluorocarbon lines without forming a frangible grip. Both of these glues have a low viscosity which allows capillary action to draw the glue up into the silicon tubing.
If using fluorocarbon for the rig body it is important to test the glued tube on the line as not all fluorocarbon lines form a good bond with the glue.

Materials required for two-way bead glued rigs
In addition to the glue you will need the following materials to make beaded rigs:
- Silicon tubing
- Micro-beads
- Two-way or cross beads
- Main trace line
- Snood line
- Rig tension jig
- A small container to drip glue into
- A few wooden cocktail sticks
- Kitchen roll for spills and drips
Tubing and Micro-beads
The silicon tubing should be matched in size to the diameter of the rig body line. An excessive gap around the line will form a weak bond with a risk of slipping and if the silicon gives an overly tight fit the glue will not flow into the tubing. In this tutorial I am producing boat rigs using 40lb X-Line with a diameter of approximately 0.55 mm and 0.75 mm internal diameter tubing provides a perfect fit.
Although you can produce rigs where the two-way beads rest directly against the glued rig stop using micro-beads allows the two-way bead to rotate much more freely.
A tip from Ireland’s Pat Wright on using the micro beads –
I use a small round bottomed stainless steel desert bowl, put in 20 to 30 of the tiny beads.
Using the last three inches of my trace body, I push the end through a bead and by pushing up the side of the bowl the bead threads on very easily.
Trimming the end of the line to a point with a sharp blade can also help.
This is by far the quickest, easiest and most efficient way I have found to do this aggravating job.
They are a bit fiddly to use and you will find escapees rattling in the hoover after a rig making session.
Two-Way Beads
When I first started using two-way or cross beads more than ten years ago the choice of suppliers was limited with most of mine being made by Tubertini, imported from Italy or Stonfo which I purchased when on holiday in Spain. There are now lots available from different tackle manufacturers, with sizes varying from not much bigger than the micro-beads to ones which would not look out of place on a long-line. I tend to stick with Stonfo for round beads, used in bigger sizes for matchstick booms and Sasame for the oval versions.

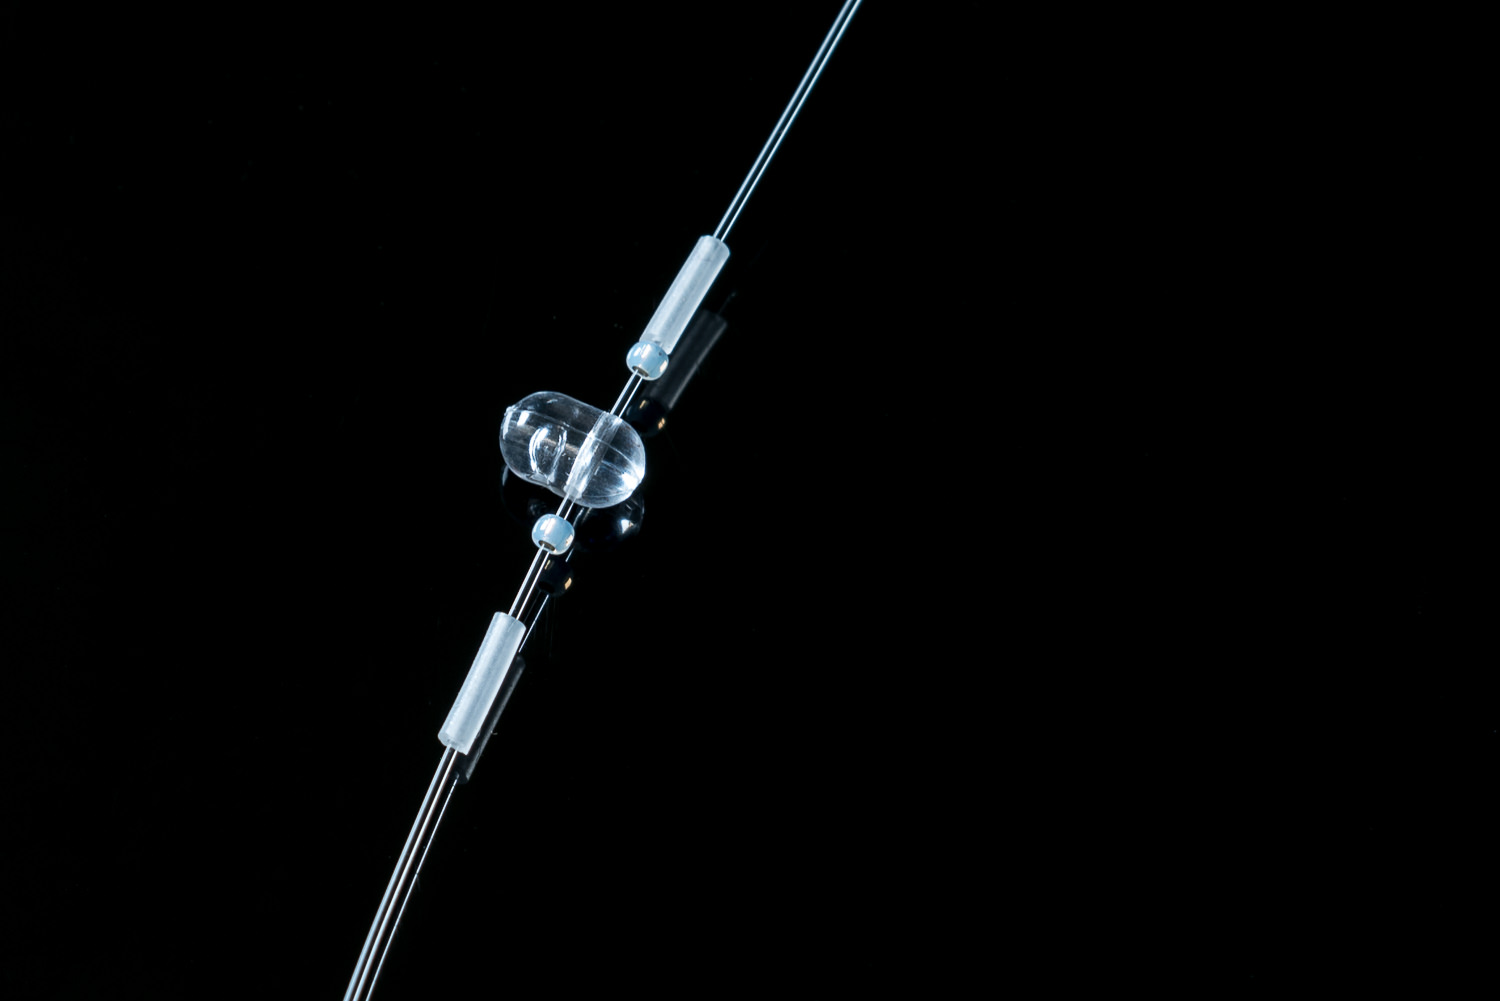
Close up of tubing and two-way beads
The sizes must be matched both for the diameter of the rig bodies and for the snood lines. The body diameter is important to ensure a smooth rotation and the snoods to make sure that a secure junction is provided at the back of the bead. My first attempts resulted in lost fish when the back knot pulled through the bead!
A number of beads are now available with short, hollow booms pre-fitted and I particularly like the Sasame spring bead which provide some added movement to the bait.
Main Body and Snood Lines
The choice of line material, breaking strain and diameter is one of personal choice. The main idea of using the glued rig stops is to produce low visibility rigs or traces and as such fluorocarbon is my first choice for both lines.
Assembling Glued Rig Stop Traces
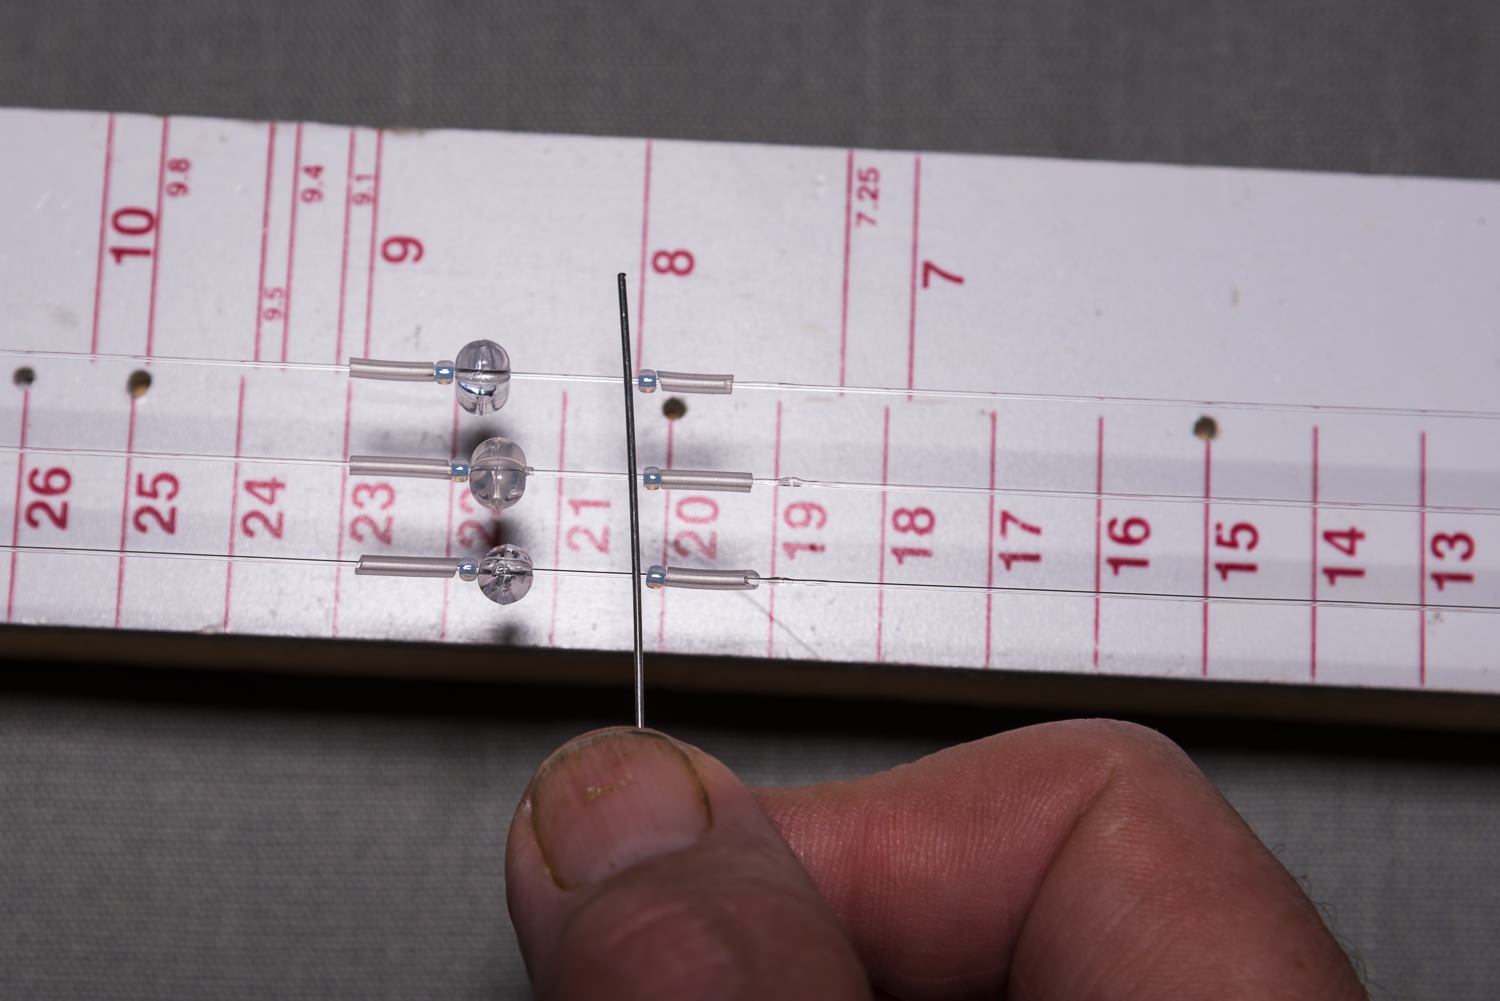
Rig making is not my favourite occupation and I tend to space out the stages over a couple of sessions. My first step is to thread a number of components on to the rig body line while still on the spool. I start by threading a 7-10 mm section of silicon tubing onto the rig body line, nail clippers are the easiest tool for trimming as scissors tend to result in flying shrapnel. This is followed by a micro-bead, which I have in a small saucer shaped dish and the two-way bead threaded through the shorter sides if using the oval design. This is followed by a second micro-bead and length of cut tubing before repeating the process.

Tubing and two-way beads threaded on trace body
Once I have a sufficient number of cross beads and tubing assembled I tie off a lead link to the free end. This leaves the components secure for when I am ready for the next rig making sitting.
When I am ready to glue the beads in place I measure off the length of trace line for the two or three hook snoods, ensuring that each bead has its micro-bead and tube partners and cut to length. A swivel is added to the top of the rig and a lead clip at the bottom.
Using a Rig Jig with Two-Way Beads
In order to apply the glue to the rigs the main trace line must be kept under tension. Stonfo have a short bracket with foam ends which allow the line to be slotted into place and tightened up.

A Stonfo line rig jig
While this is a handy mobile tool it is not the best when producing a number of rigs. Large, commercial rig jigs are available but with price tags of over £100 these are out with the range of most anglers.

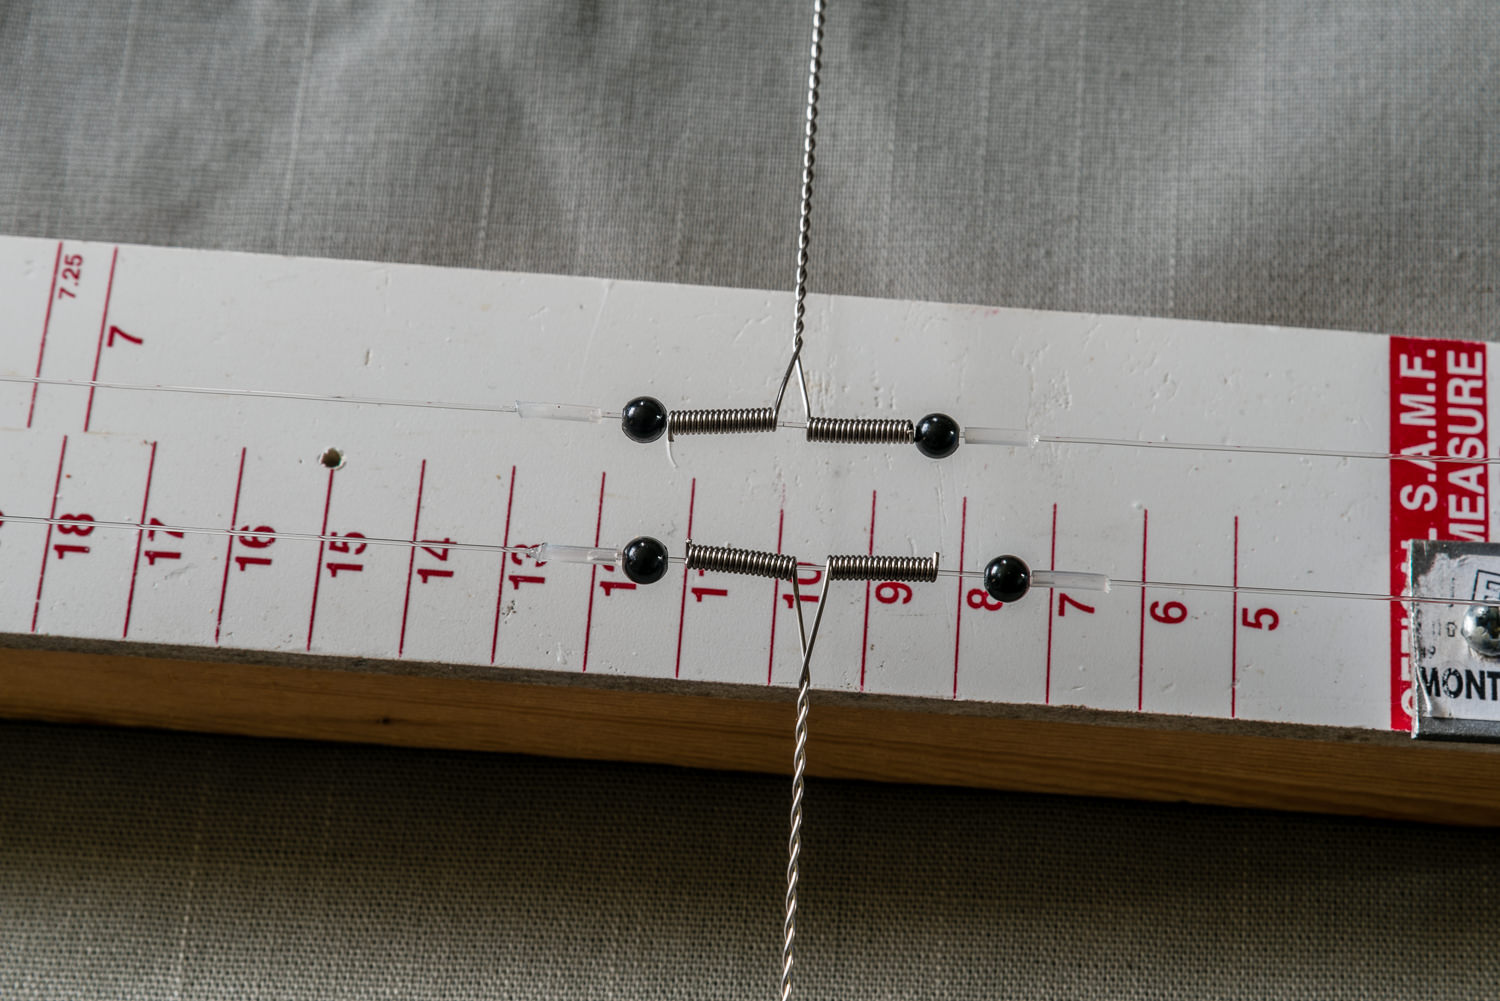
An alternative is to make your own. I use cut Stonfo brackets which are screwed to a one metre Ian Golds match measure and wooden board. This keeps the line under tension and allows me to work with two glued rig stops assemblies on one trace, and have several rigs on the go at once.

Components in the rig jig
The version in the photos here uses one bracket which holds three rigs but I since added a second bracket to allow six rigs at once.
The one meter length of the rig jig lets me produce two snood droppers for most of my traces and if using three hooks or rigs with longer main bodies the trace line can be easily shifted to allow for the positioning of the additional two-way beads.
Glueing in Place
Once the trace bodies, with beads and tubing in place, have been located in place on the rig jig the beads can be spaced out as appropriate along the length of the body line.
I utilise a small plastic tub, the cover from an e-cig tip, and drip 5-6 drops of the rig glue in it. This allows me to use the wooden cocktail stick to pick up a small quantity of the glue to apply accurately to the trace body. Both the aforementioned glues will remain workable for at least five minutes.
Always apply the glue to the side of the line away from the two-way bead to ensure that that bead is not affected.

Apply the glue with a cocktail stick
Once the glue is applied to the line slide the length of tubing towards the glue. When the tube and glue touch the glue will wick up inside the tube where it will set. Setting time varies on the amount of glue and the glue type but generally takes 20 to 30 seconds if the glue transfers totally inside the tubing.
Repeat the process for the other side of the two-way bead. I generally do one side of the beads in the two bead positions before completing the second side.

Push the tubing away from the two-way bead and over the glue
You could apply the the glue directly to the line but the flow is extremely difficult to control even if using modified nozzles.
Adding the Snoods
Once the glue has set the snoods can be added. There are various ways of securing the spare end of the snood, opposite the hook. Depending on the closeness of the matching diameters a figure-of-eight knot may suffice. If the fit of the snood line is looser a length of heavier line can be laid parallel to the snood before knotting.

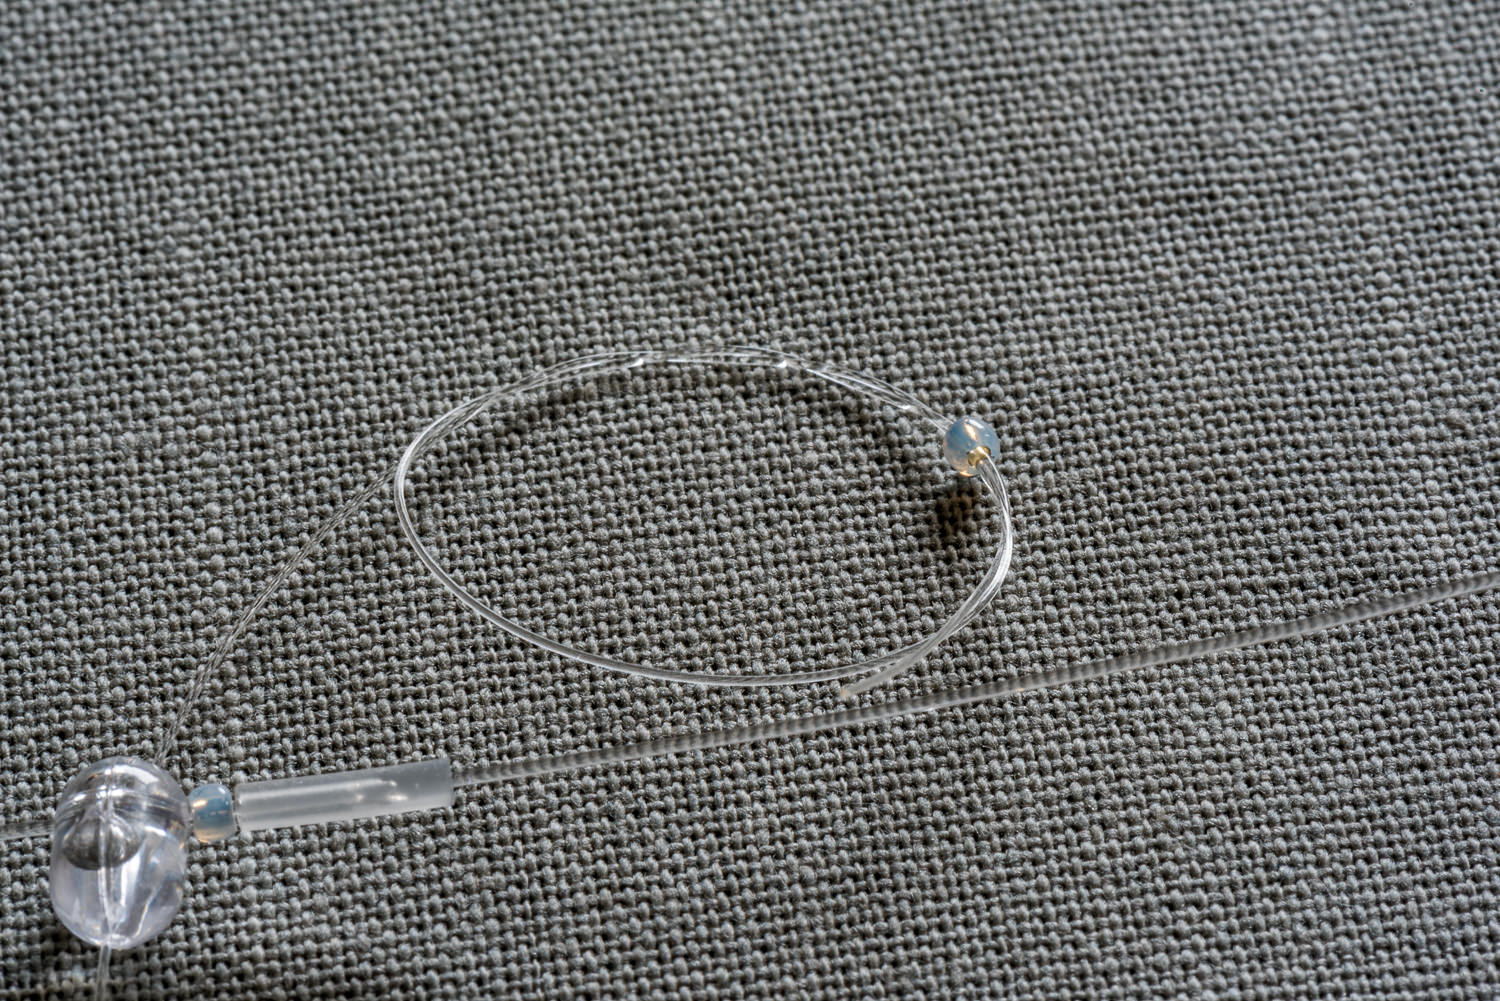
Snood tail knot over micro bead
My preferred method is to slip on a micro-bead and thread the snood line back through the micro-bead a second time forming a loop before wrapping the snood round “Uni-knot” fashion to provide a secure finish.
Tip: If using a plain figure-of-eight knot I would recommend three turns rather than the normal two. Don’t cut the tag end off until you have applied tension to the knot against the bead by slowly pulling on the snood.
Alternatives to Two-Way Beads
The glued stops can be used to fix small swivels or booms in place.

Wire booms located using glued stops
In addition to the thread on two-way beads several tackle suppliers produce clip on beads. To use these you simply omit the beads when assembling the rigs, leaving enough space to accommodate the clip on beads.
One advantage of this type of bead is that rig bodies can be made with several glued stop positions allowing the angler to vary the height of the snood locations at any time.