Lure manufacturing is a multi-million dollar business in the United States alone. Visit any store that sells fishing tackle and you will see what I am talking about. Rows upon rows of lures tempt all of us that is until you see the prices. It will cost you anywhere from $5. 00 to $20. 00 for a lure.
The Trade tell us that they are the “must have” lures, meaning you aren’t a real angler unless you have these latest and greatest lures in your tackle box. However, lure carving is not only cost effective but provides the satisfaction of catching fish on a lure prepared from start to finish at home.
I firmly believe that some of the commercial lures are designed to catch more anglers than they are fish. Thirty years or so ago many of the popular fishing lures were made out of wood. Our forefathers often spent time carving those little things they needed, including fishing lures. Today a great many of these lures, despite the company name on the package, are made from plastic and are made in China.
With a little time and effort you can make your own, just like they did back in the day, and save some money doing it. I like large plug-type lures or lures that closely mimic the type of food that the fish are eating. For the most part large, aggressive saltwater fish in the US like large lures, so that is what I carve.
Construction Materials
All wood is not created equal. Lure carving requires a wood that floats well and is easy to work with. Around my neck of the woods that usually means white pine. Hardwood such as oak and maple, while they will work, are very hard to carve and thus I would suggest that you stay away from them if possible. Old broom and mop handles work well for carving the larger plugs.
A large, ¾ inch or larger, dowel will also work.
Tools of the Trade
There are speciality tools out there for the wood carver, but I prefer to use the same tools that my predecessors utilised; a pencil, a pocket knife, a saw and some sandpaper. That being said, a Dremel tool, or similar, will cut down on your lure carving time. If you want to add color to your lures then some model paint and some paint sealer will be needed. Once the lure(s) are completed you will need some small eye screws, split-rings and hooks. The sizes of each of these will depend on the size of the lure you are making and the fish you intend to go after.
Step by Step Lure Carving
What follows is the step by step process in carving your own lures.
- Gather all of your supplies. There is nothing worse than getting part way through a project and not having everything that you need.
- Cut the wood about two inches longer than you will need. This extra length will give you plenty of room to work with.
- Take your pencil and draw out the basic shape of the lure that you want to carve. For the sake of the photos I went over my pencil marks with a marker as well. You may want to do this anyway as it makes it easier to see.
- Now the fun of lure carving begins. Let your imagination and drive take it from here. I have easily carved a lure in one day; other times it may take me a week to complete. It all depends on my mood. Despite your best plans, sometimes you just never know what will happen once you start carving. The wood may split or there may be a hidden knot or other defect in the wood. If your first plan fails, don’t quit, just move on to the next piece.

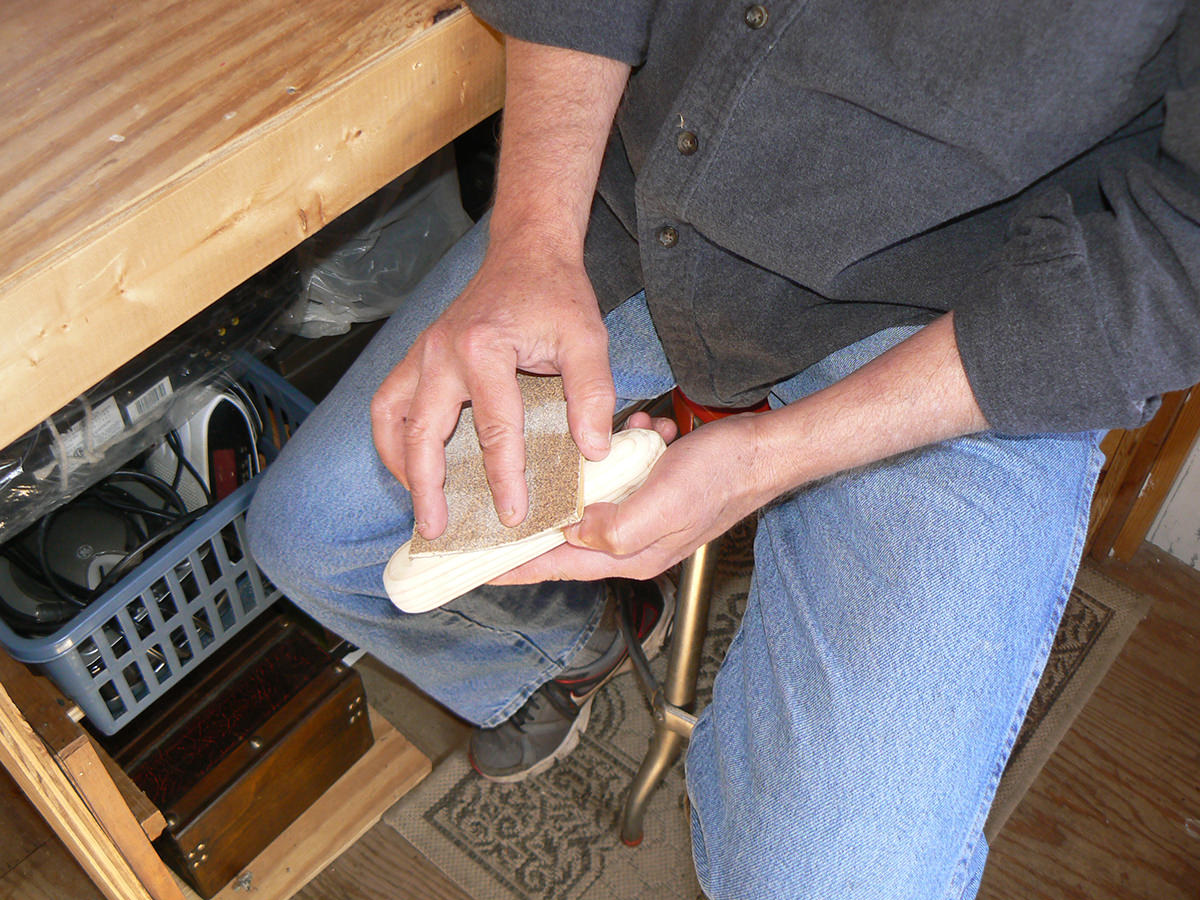
- Now that you have your lure(s) carved it is time to finish them. Start by sanding out the rough spots and knife marks. I like to start with #60 grit paper and work my way down to #120 grit. Sand it until you get the wood surface smooth. The smoother you get it, the easier it will to finish.
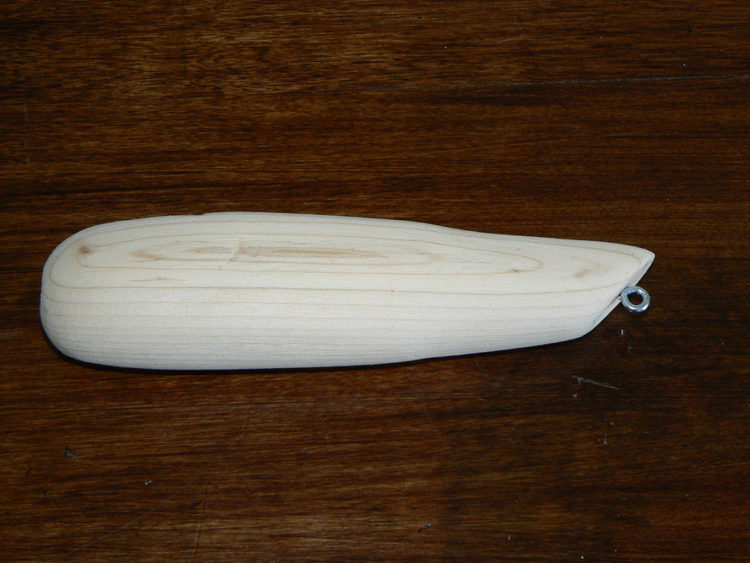
- Put one eye screw into either end of the lure. This will allow you to hang the lure or give you something to grab while applying the finish. A drop of epoxy can be added to the thread to help secure the eye.
- Apply a primer or wood sealer to the lure and allow it to dry. This will help the lure stand up to exposure to saltwater. A primer will also make the finish coats of paint go on smoother. I like to use white water-based acrylic paint as my primer coat. This paint is readily absorbed into the wood; is easy to clean up and the white is a very good base when adding other colors. I usually apply three or four coats of white before I add other colors.
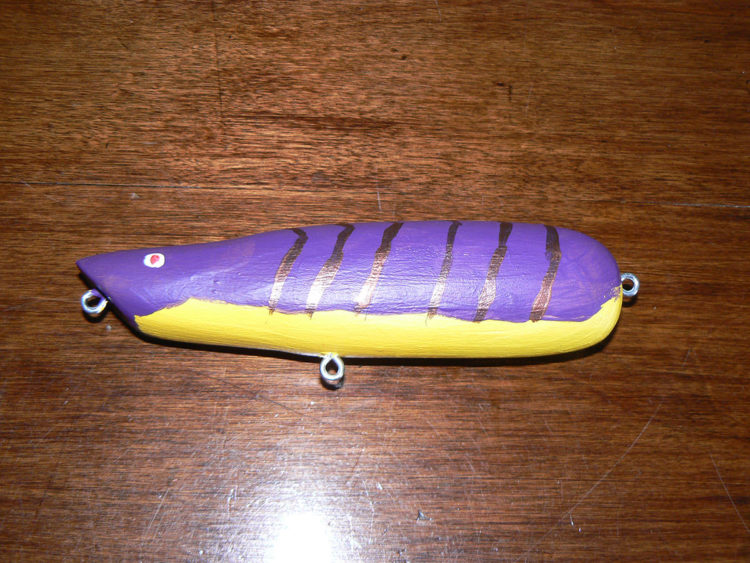
- Using the paint of your choice (stay away from water based latex paint), apply multiple light coats instead of one heavy coat, allowing it to dry thoroughly between coats. If you are painting multiple colors, do one color at a time, allowing each one to dry before applying the next. Once the paint is dry I like to apply a clear marine sealant to the lure. This additional step helps protect the lure from damage. If you are using a water-based paint, make sure that your sealer is water-based as well. Adding an oil based sealer to a water based paint will usually lead to a big mess. If there is any doubt, test it on a piece of scrape wood before putting it on the lure.

- At this point you are almost done. Put on the rest of your eye screws. Attach the split-ring to the eye of the screw and then attach the hooks to the split-ring.
There you have it. For the cost of a couple of the commercially produced lures, and a little time and effort, you can make four, five or even more home-made lures. While hand carved lures will probably not replace those bought in a store, catching a fish that feeds your family on a lure that you produced gives a great feeling of satisfaction.