In the latest of his nifty knot tutorials Neil Mackellow looks at uses for the Snell knot, before carefully guiding us through a set of easy steps to forming this superb hook-to-mono connection.
Attaching hooks to mono with a knot that gathers and holds around the shank of the hook rather than one that ties to the eye is something of a forgotten art among sea anglers. Spade-end tying or snelling as it is known, provides a in-line pull to the fish and is actually stronger than a standard knot because the line is not compressed and weakened at the point where it would otherwise pull tight again the eye.

In these days of lighter lines, small hooks and similarly neat little baits, the ability to attach hooks in this way is a core fishing skill that all anglers should have at their disposal. I should stress that a Snell knot isn’t always the sea angler’s best friend when it comes to presenting baits – especially worm baits that need to be threaded up the whole of the hook and onto the snood line. The reason for this is that the knot fattens the area that the worm has ride over, and it came serve to disembowel smaller ragworm and lugworm baits. But when worm baits just require to be head-hooked, or the likes of a mackerel or squid strip just need to be hung, then a Snell-knotted short-shank hook pattern is very efficient.
Pennel Patter
Another clever use of this type of knot is to lock the top hook of a pennel arrangement firmly in place. But to do this you must leave a generously long tag-end in order for the lower hook to be positioned ahead of the Snelled hook. Many fish – particularly bigger winter cod – are snared on the top hook of the pennel, and fixing it so that there is no chance of slippage under strain sees more fish hooked and landed in my opinion. The downside to Snelling your pennel is that the hook set-up cannot be adjusted to accommodate different sizes of baits, but this has never been any sort of problem for me as I fish pretty much the same sized baits all the time.
The Snell, the Dumhoff knot, the whipped finish knot and knotless knot favoured by carp anglers are all variations on a theme and achieve a similar secure fixing to either a spade-end or eyed hook. My Snell knot is easy to learn and has never let me down.
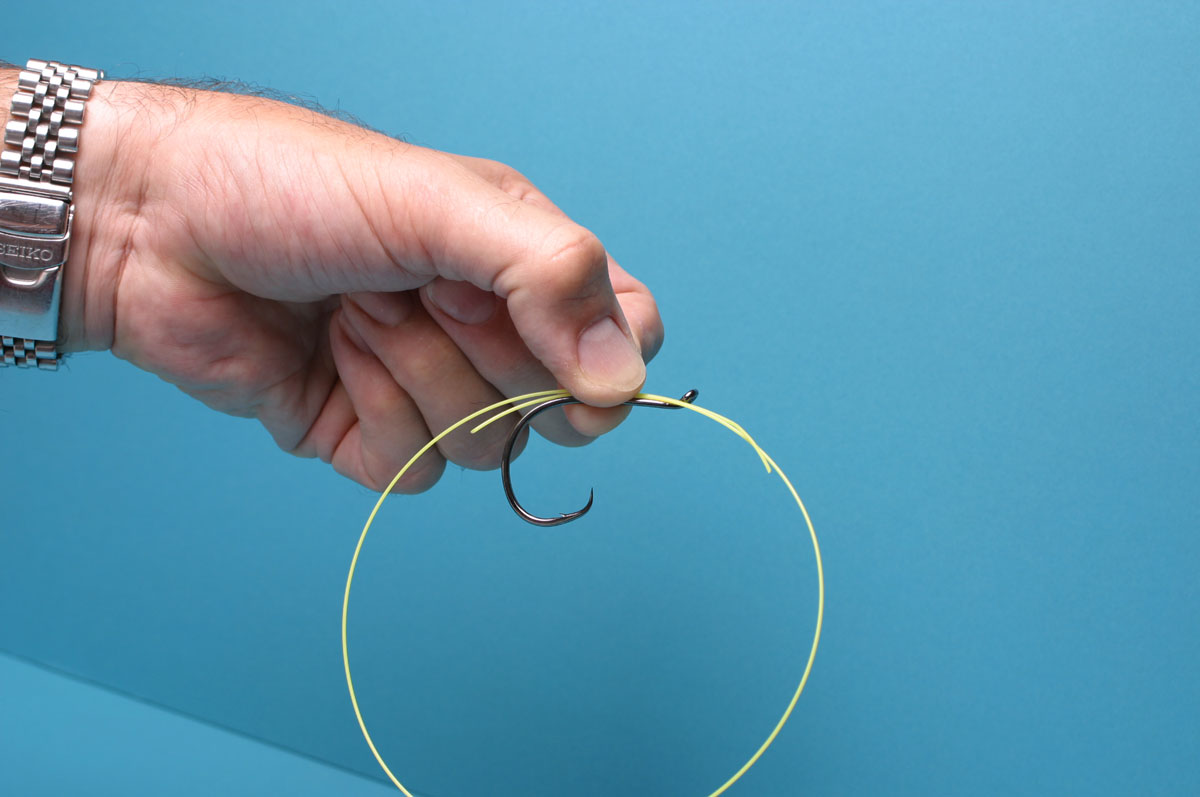
To make the stages sequence easier to follow I have used a fairly heavy yellow coloured line. See exactly how to tie the Snell knot by clicking through the step-by-step pictures below.

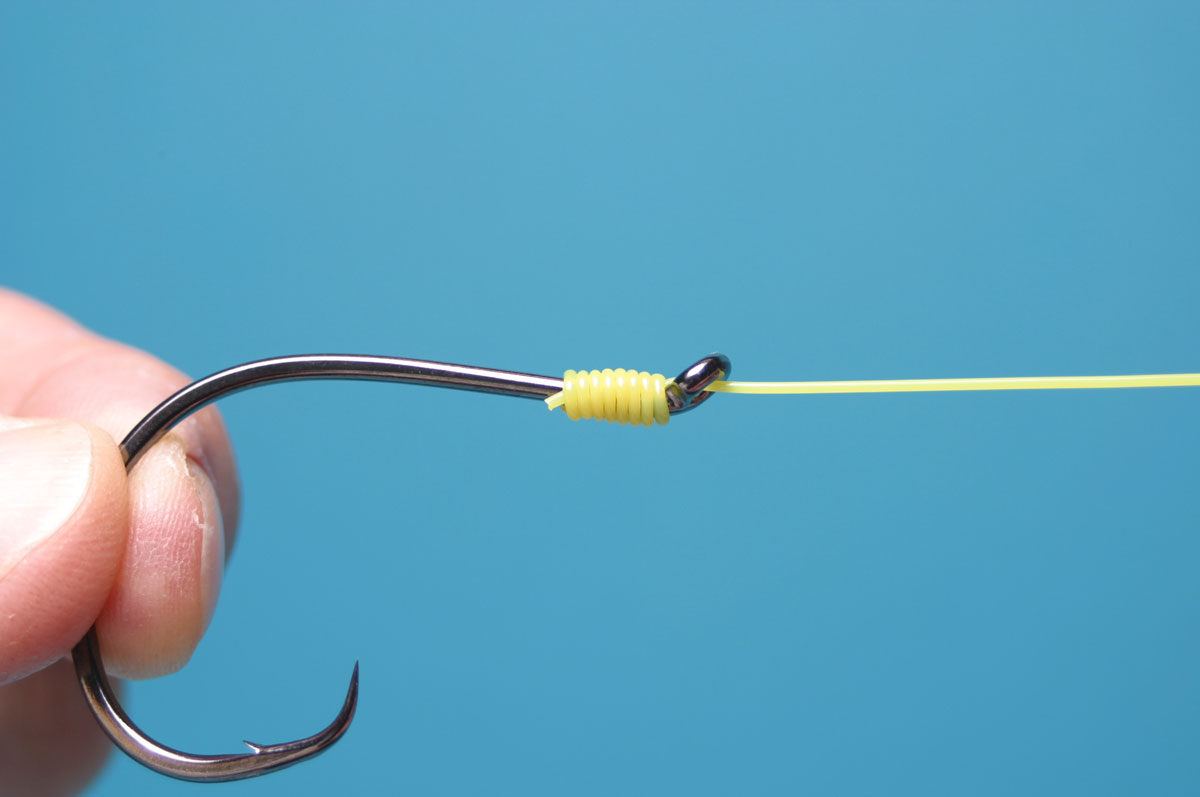
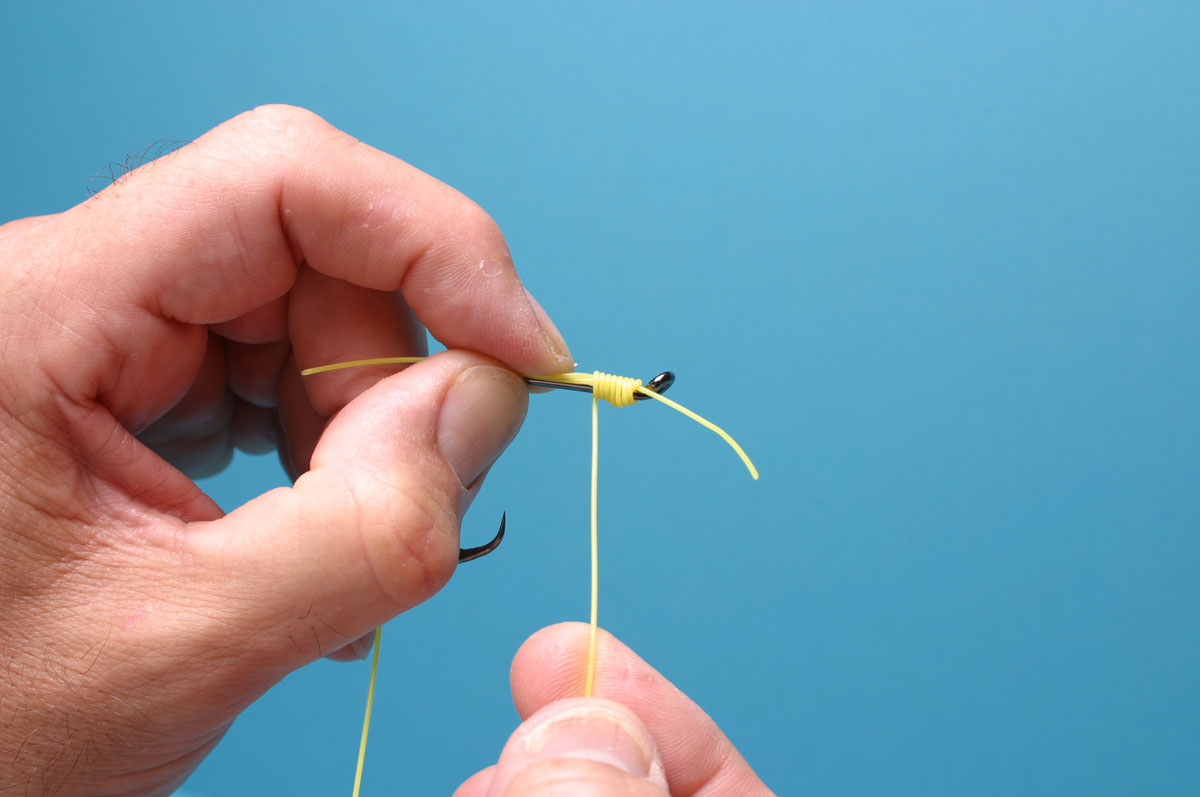
Keep the whole process tight and continue wrapping the turns, taking care that they form hard against each other
Wrap the loop around the shank and line between 4 and 10 full turns. Lighter line will require more turns

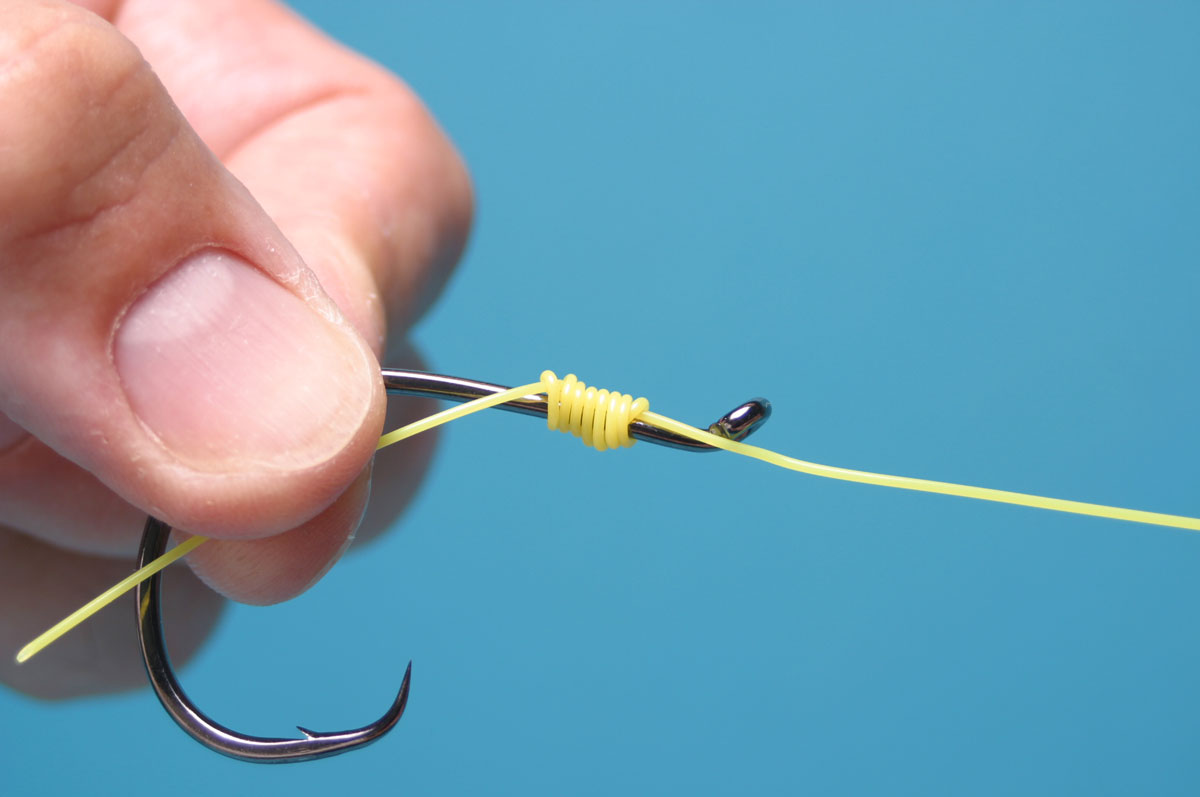
Holding the tag end against the hook shank, gently pull on the snood length to start to tighten knot

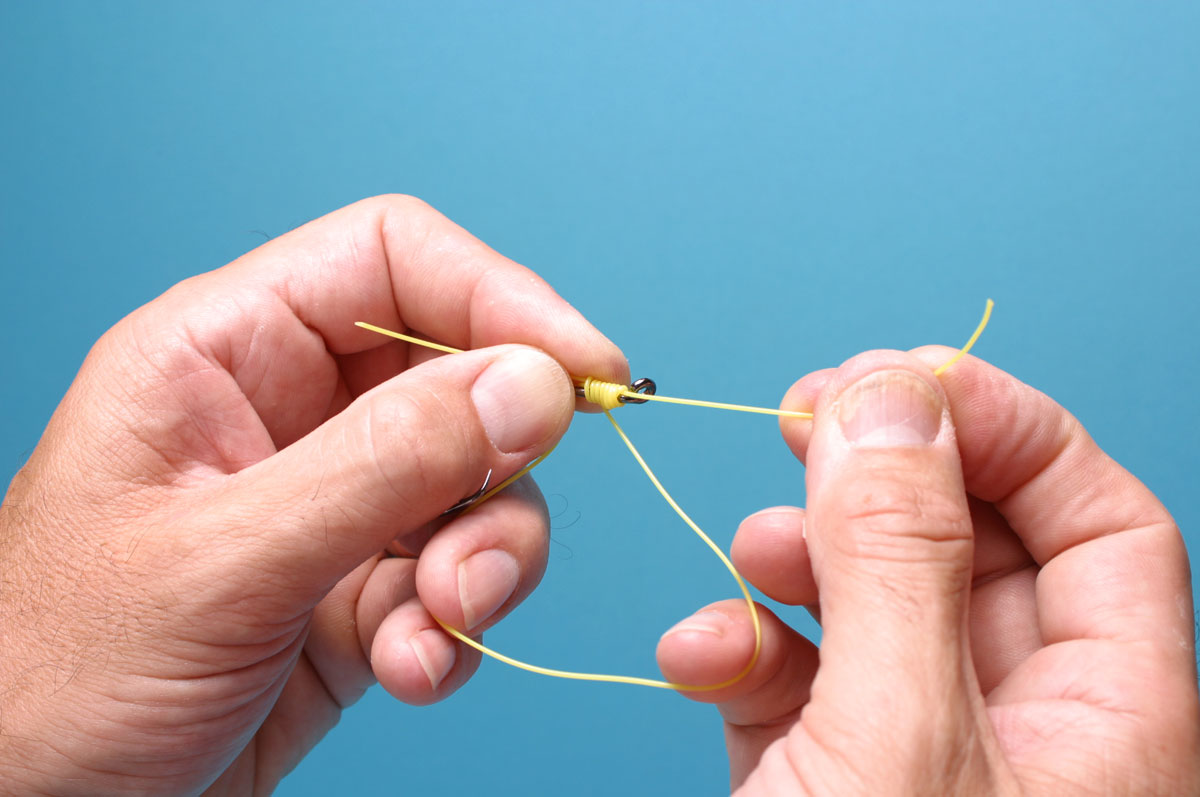
Continue to bed knot down by pulling firmly and steadily on the snood end
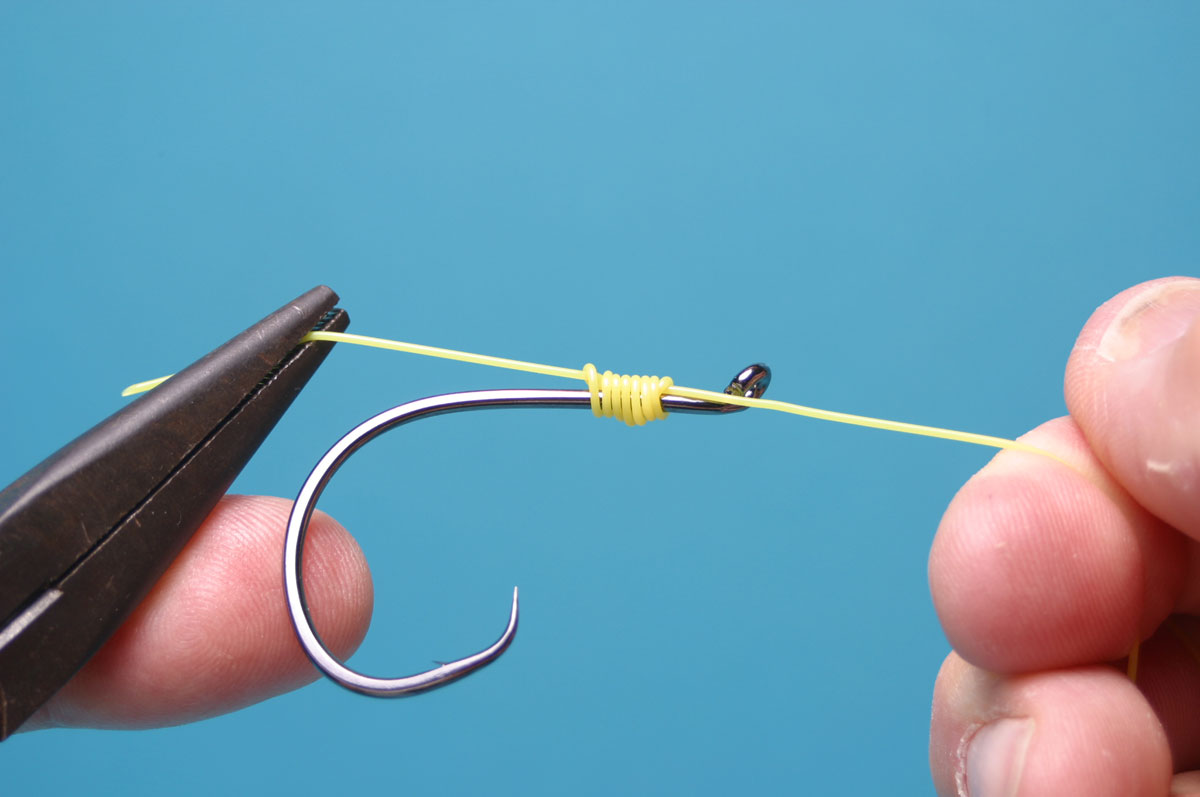
Tighten the knot by pulling on the tag and snood ends after moistening. Pliers may help with heavier line

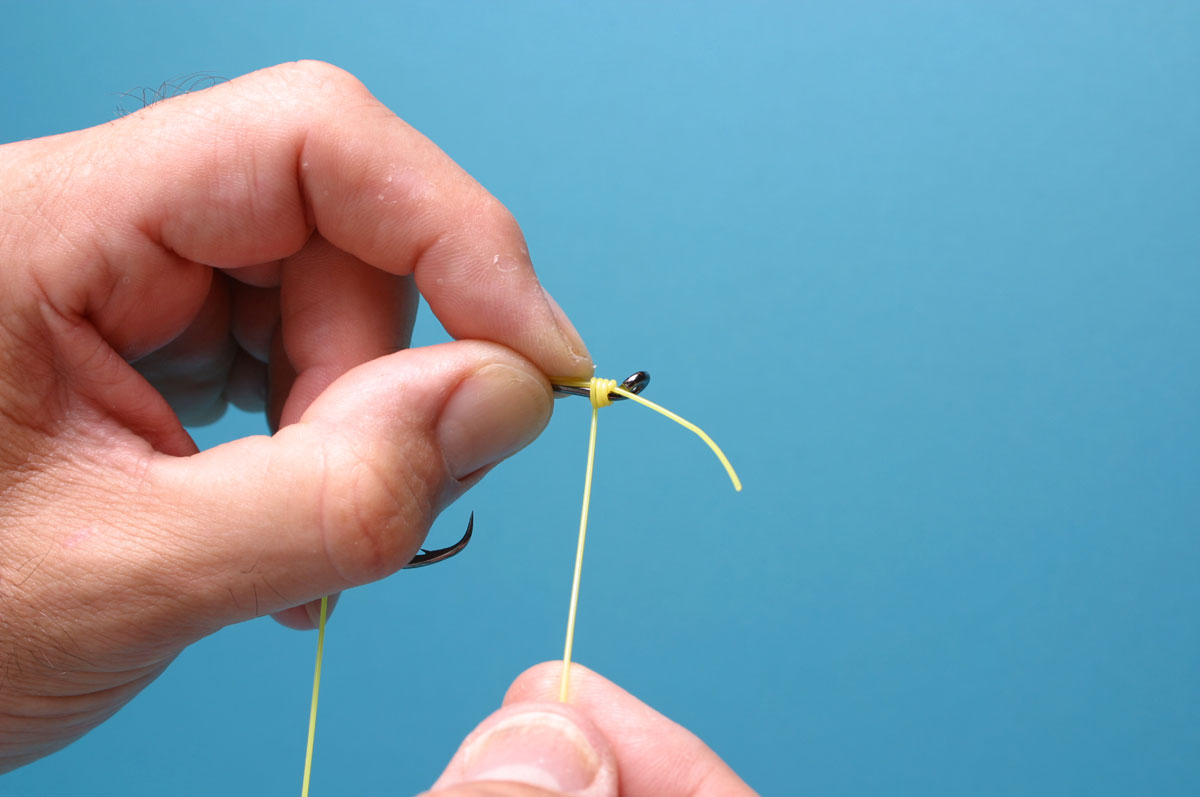
Tightening will draw the knot neatly together

Slide the knot up to the eye and trim tag end to complete