Steve Souter reveals all you need to know about locating and digging white ragworm. Storing this deadly bait is covered later in part two of an exclusive whiteworm trilogy.
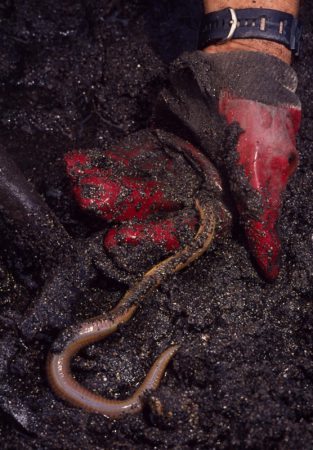
 White ragworm and rarer king whites are revered and precious baits among shore, and to a lesser extent, boat anglers countrywide. On their day whites are simply devastating with the power to pull regular fish while other baits don’t get a sniff. Whites, silvers, snakes, catworms, whiteworms in the North East of England, and jennies in Eastern Scotland are just some colloquial aliases which white ragworm go by. The actual colour of worms can vary considerably depending on the ground dug and the specific part of the country. Aspect can differ from milky white, dull grey, white/pink, and jaundice-yellow, to shades of brown.
A slow growing worm, whites are very susceptible to heavy digging pressure, and may never return to an area once it has been exhausted. The biggest ‘king’ whites can be as thick as your index finger and grow to over 12 inches in length.
Serious anglers and matchmen know the value of a good supply of quality whites and will drive for hours to dig better marks. Demand however, will always outstrip supply and many beaches are hard pressed to sustain the volume of diggers who repeatedly descend on every yielding tide. Most whiteworm beaches can only be dug on the biggest spring tides. Few professional diggers offer ‘quality’ whites for sale, as they are a scarce commodity at the best of times, and from a simple business viewpoint, lugworm are much easier to source in viable quantities.
Where and When
In scientific terms whites are in fact a common marine invertebrate encountered intermittently all around the UK shoreline. Various different types of ground are home to white ragworm, but beaches displaying all the hallmark characteristics of a good digging area can be confounding and devoid of worms. Equally, some apparently featureless sand beaches sustain colonies of whites – a couple of fishing’s mysteries.
Shallow ‘scrub’ on top of bedrock – exactly the type of ground that’s hell to get the fork into – as well as shale & mussel beds, especially along sandy edges, provide some of the best returns. Also, try working tight against rock ledges and around the base of large boulders… these areas are often overlooked by unfocused diggers. Such energy-sapping marks can be excruciating work, but a big plus is they can usually be dug successfully on less favourable, middling tides.
Selecting the correct tide and the wind’s influence are critical factors. Most prolific white ragworm beds are located below the normal low water margin, and will only be uncovered for a short period during the largest spring tides. Indeed, some of the very best marks may only uncover two or three times a year, while some might not be revealed from one year to the next. This is certainly true of some of the marks where I can access better quantities of worms.

Wind direction is critical, and often the determining factor in whether or not bait beds will uncover. As little a metre of beach can be the difference between fantastic digging and sterile sand. An offshore wind allied to a dropping spring tide will not only help speed exposure of the ground, but it can also force the tide back further, beyond its normal stopping point. On an east-facing beach, a wind from the west might be required. Conversely on a west-facing shore, an easterly wind direction normally makes all the difference. It makes good sense to dig a slightly smaller spring tide with the wind off the land, rather than the biggest according to the tide table, with the wind thundering in off the sea and up the beach.
Tools of the Trade
Forks for extracting whites should be chosen to best extort each different type of ground. Consider for example then, that a fork that’s appropriate for trenching wet sand is not best suited to cutting through harder scrub mussel beds. The correct digging implement makes lighter work of the task in hand, but it’s amazing the number of diggers who blindly preserve with the cheapest DIY shop forks. Any old fork won’t do. I have three for digging whites, each for a particular situation.
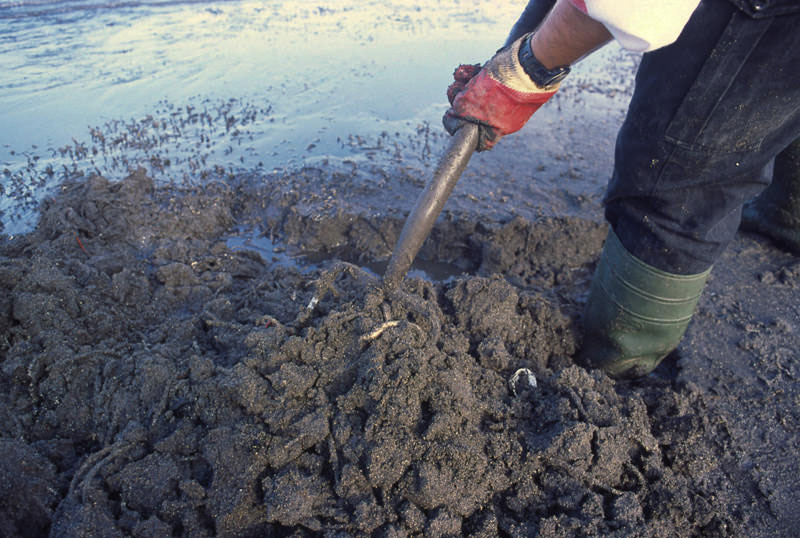
For digging among tube cases in sloppy sand, I use a welded all-steel fork with flat, seven-inch tines. Standard narrow or square tined forks are not so efficient in this instance, as wet sand has a tendency to slough straight through the fork. For shallow, restrictive digging through mussels and scrub-covered bedrock, my preference is for a narrow ‘lady’s’ fork with needle-sharp prongs ground back to just five inches. The short fork is perfect for removing spoil from those awkward nooks and crannies where whites love to hole-up. A very sharp, narrow-pronged fork is used on certain estuary marks for negotiating shale, and generally coarser digging.

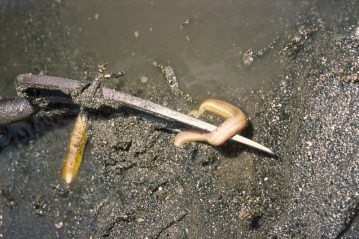
A segregated bait-bucket is invaluable, as various bonus baits such as razors, large black lug, king rag, gaper clams, butterfish and sandeels are regularly unearthed incidentally while digging whites. Shellfish can be lumped together, but always endeavour to house different kinds of worms separately. It’s inevitable that some worms will suffer fork damage. Those leaking fluids can corrupt perfect worms and it is imperative to carry any punctured bait separately.
Wellies are adequate garb for some beaches but thigh or chest waders, while helping keep you relatively clean, will also allow you to venture onto uncovering bars and sandbanks. Bait digging does have its risks however, and under no circumstances be tempted to linger on a bank beyond safe limits.


It wouldn’t be the first time I have turned over a weaver while digging for whites in sand. So while wearing a pair of rubber gloves might appear ‘girlie’, it’s not as daft as it sounds. A good pair of gloves will also help you avoid the painful blisters that unprotected hands are susceptible to.
For reasons of work during daylight hours, secrecy surrounding many marks, and also because many of the biggest autumn and winter spring tides occur in darkness, a good headlamp is essential. There are some brilliant lamps on the market now that make night digging a breeze. For my money Samalite and Tiga offer the very best but there are other excellent options to suit a variety of budgets.


How to Dig
Modest whites are regularly unearthed as a bonus while digging lug or red ragworm, but dedicated digging is a skill and discipline apart. Whites love tubeworm-infested sand, but they are not inclined to greatly populate beaches where the ground is compacted very hard. Whites are capable of a fair turn of speed and prefer more macerated sand, which they can zip through unhindered.
Contrary to the popular belief that whites are always found in the first four inches of sand, many worms are missed because the digger is not going deep enough. Whites can be found a fraction below the surface, but they can also be buried down 10 or more inches – trends vary according to different marks. Occasionally, whites will break through the surface of their own accord. This is routinely the case when a large group of diggers are tramping about and ploughing a small sandy area. Surfacing worms will often be evident in the gaps between indiscriminate digs and trenches. Jumbo snakes tend to lie deeper than average-sized worm, particularly as the tide ebbs toward bottom water. As the tide floods worms push much nearer the surface. It’s energy-efficient and most productive to shallow-up fork depth when the tide turns to flood.


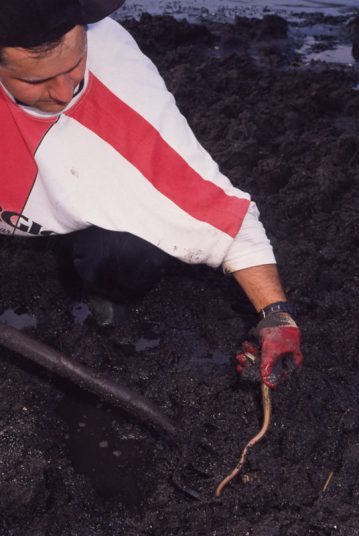
Trenching is the most productive approach provided worms are grouped close enough together to justify it. First remove a line of four or five spits of sand to open your dig. Next, move side-on to the dig, and working back and forth, repeatedly pull forkfuls of sand into the trench for as many lines as is productive or practicable… this is known as back-filling. Back filling serves two purposes. The first, theoretically, is to allow the ground to settle back as you found it, with the tide’s help. Secondly, it makes sense when there’s little enough digging area as it is, not to obscure un-dug ground by slinging sand all over the place.

I find standing with one foot in the trench and one on solid ground gives the best purchase, allowing you to maintain a steady digging rhythm. Speed digging is a term that describes digging whites well. There is no need to lift out and upend huge spits of sand. This is a recipe for a snapped fork, strained back and a bare bait bucket. As far as possible try to avoid pushing the fork home with your foot…it’s too slow. Force the fork in using your shoulders and arms, and paddle manageable amounts of spoil back into the trench. If you can imagine the action of paddling a canoe, then you should get the picture.
Even with all things in your favour, it’s the nature of these types of marks to grant minimal digging time. When a tide dictates that I’ve only got an hour-and-a-half to get the required worms, I won’t break digging stride or come up for air until absolutely necessary. Elbow grease and perseverance are the essential ingredients.
Night Work
Whites are much easier to dig in the dark than lug or red ragworm. Easily spotted due to their colour, few are missed with the aid of a bright, reliable light source. While digging in darkness might seem alien to some anglers, there are times when known productive beaches mimic Blackpool illuminations. Any normal people in the vicinity must wonder what the hell is going on!
Because exceptionally wet areas don’t receive the same attention as those that are dry and therefore easier work, they often hold more worms. Digging a draining moat as you might to clear an area for digging lugworm, is usually impractical because time is against the digger. You might get little more than an hour on the best marks before being beaten back by the returning tide. It’s better to attack the ground from the off, with lots of smaller digs rather than fight a lost cause with a constantly collapsing trench. The routine is rhythmic and goes something like – four quick spits and move – four quick spits and move… and so on.

Some gritty shale beaches, mussel beds surrounded by estuary sand, and patches of scrub-topped clay tend to sustain small to medium-sized whites. Often home to good numbers of worms, these cloistered types of marks cannot handle large-scale digging. Indeed, regular attention can decimate them completely. Most knowledgeable diggers have a couple of these ’emergency marks’ up their sleeve and will only resort to them in desperate circumstances. Once I have dug one of my scrub marks, I will endeavour to leave it fallow for 6 months, which works out fine providing other knowing diggers don’t shoot the plan to pieces.


