After showing us how to make the mould, Alan Banks explains how to pour your first custom plastic lure.
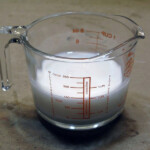
The base material you will be using for this is Liquid Plastic. This thin milky liquid requires heating to around 170°C for it to change into a clear and slightly thicker liquid, that when poured into your mould and allowed to cool will form your finished soft plastic lure. When buying liquid plastic you can choose what hardness you require for your lure depending on the application. For worm or slug type lures for example you will probably want to use a soft plastic and for shads you may want something a bit firmer. You can also customise the hardness of Liquid Plastic if you wish by adding softener or hardener at around 10 to 20%. These additives must be mixed into the liquid plastic before heating.
As you are going to be heating the plastic to a high temperature it is important to make sure you are wearing suitable clothes and some basic personal protection. Any spillages that may happen could result in some nasty burns so it is essential to be wearing heat resistant gloves, which will also protect you when handling hot tools. It would also be a good idea to wear some goggles just in case some spilt plastic ends up a bit higher. Lastly you will find that when heating the plastic it will give off some vapours, so only do this in a ventilated area and ideally wear a respirator to protect your lungs.
![]()
The next step is to decide how you are going to heat your liquid plastic. The most common and easiest method is to use a microwave. It is probably a good idea to use one that you won’t be cooking food in as the other users might get upset. The other heating method is to use a pan on the hob but it can be quite hard to control the heat and requires constant stirring to stop the plastic burning on the bottom, this in turn can add unsightly bubbles into the plastic so I wouldn’t recommend it. When heating liquid plastic it is best to not do it too fast or too high as this can cause overheating and will result in the plastic turning yellow, or at worse totally burning into a black unusable mess.
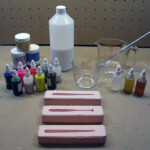
Items needed to make your soft plastic lures
- your pre-made moulds
- a bottle of liquid plastic
- some liquid colours
- some heat resistant glitter
- one or two fine spouted microwave safe glass jugs
- a stirrer – metal is best as wood can cause bubbles
- some scents
- grip seal bags
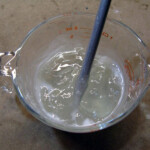
Before you start first check the bottom of the bottle of liquid plastic, as some of the material can settle there. It is important to ensure that the plastic is fully dissolved as if it is not you may find that the finished lure is too soft. So give the bottle a really good shake for a couple of minutes, if there is some that is stuck to the bottle and will not dissolve then you can help it along by carefully pushing the edges of the bottom inwards to release the material. When you are happy that the plastic is ready then now it is time to pour some into a microwave jug.
![]()
![]()
Next step is to begin heating the plastic. Now the amount of time this takes will vary depending on how powerful your microwave is and how much plastic you are heating. A little bit of trial an error is needed at first until you get used to do it. As mentioned before it is really important to not heat the plastic too quickly as this will cause it to burn and turn yellow, which is not what we want so take your time.
It is also best not to heat using full power as this will be hard to control, so use a lower setting. Start by using the microwave on 50 – 75% and heat for 1 ½ to 2 minutes, then take the jug out of the microwave and stir the plastic.
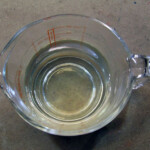
You will notice that the plastic is starting to go clear but can be thick and quite lumpy, so time for a bit more heat. Put it back in for another 45 seconds on 75% power. Remove again and stir. It should now be about the consistency of vegetable oil. If there are bubbles in it then pop it back in the microwave and heat for another 45 seconds on 50% power. This time the plastic should come out perfectly clear and almost totally bubble free.
![]()
![]()
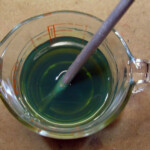
The next step is to add some colour to the plastic. Always shake the bottles of liquid colour before using and add just a few drops to begin with and stir in to the hot plastic. The colours are very concentrated so you will not need a lot and the more you add the more opaque the plastic will become.
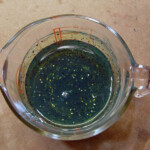
If you want a very translucent colour then it is best to add a few drops to the plastic before heating, fluorescent colours must always be added this way. Also all colours can be mixed together to get the exact shade you want and with a little bit of experimenting you can come up with some amazing effects. Here some Motor oil colour has been added which is a clear dark green colour.
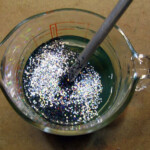
Next step is to add some glitter which will give your lures a sparkle in the light. You can only use heat resistant glitter when making lures as the hot temperature of the plastic will cause normal craft glitter to shrink to almost nothing and even bleed colour into the plastic. Also do not use aluminium based glitters as if you heat the plastic again in the microwave this may cause sparks and the plastic could catch on fire.
![]()
![]()
Stir in the glitter an if at any point the plastic has started to cool and thicken then heat it up some more on 50% for 30 seconds, remove and stir again as the glitter may sink to the bottom.
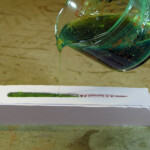
Now it is time to pour the plastic into your moulds. Again take your time and pour in a nice thin stream in one go. This can take a few goes to get it right and not overfill the cavity but once you have done it a few times you will get a perfect pour every time. If you want to make a two coloured lure then heat two jugs of plastic and colour separately, pour some of one colour into the cavity first and then pour the other colour on top.
![]()
![]()
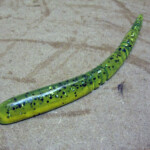
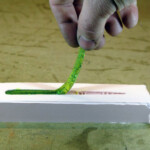
Once poured you must allow the plastic to cool for about 5 minutes or so before removing from the mould and is best to let it totally cool down. Do not be tempted to pull it out if the mould too soon as this can distort the lure if not cooled properly and also you run the risk of burning yourself. And there you have a finished soft plastic fishing lure.
When you have a few made it is a good idea to store them in a grip seal bag. Try to store only the same colour in one bag as some dark colours may discolour the lighter ones. You will find if you put them into the bag as they may stick together, so it is a good idea to add a couple of drops of lure lube to the bag to prevent this. Also this is a good time to add liquid scents to the bag which will penetrate the lures when left for a few hours.
The final step is to stand back and admire your work, then get out there and catch some fish on your very own creations.
![]()
For full size images click on the gallery pictures below.
Alan’s website has all you need to start making your own plastic lures.
Part 1 details how to make the mould for the lures.

