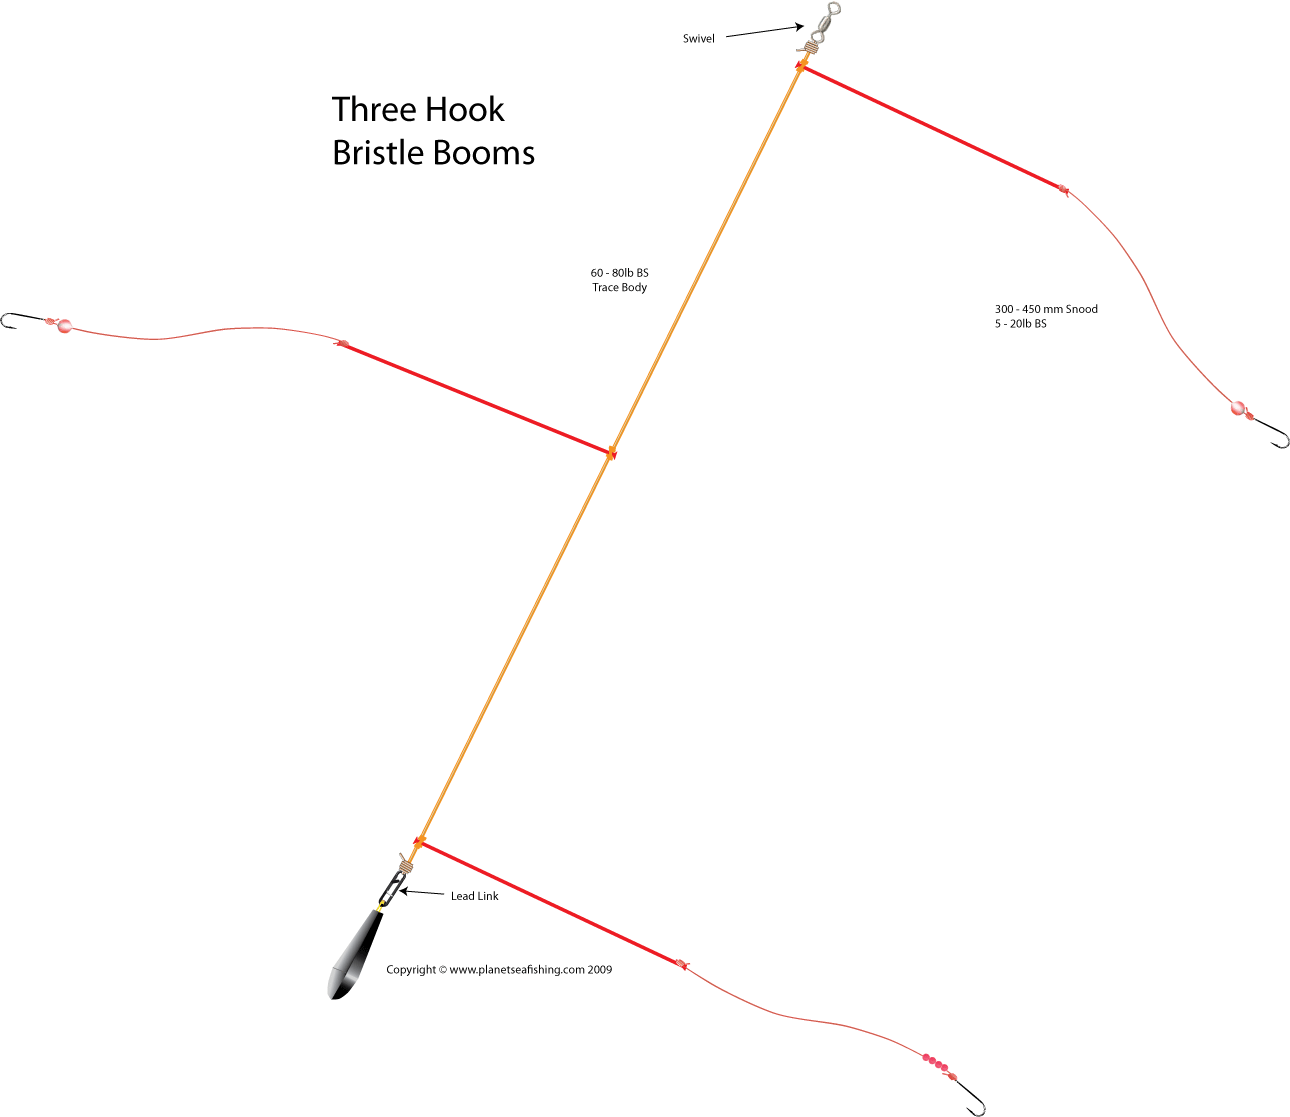
Light weight matchstick bead booms are a valuable addition to the armoury of both the boat and shore angler, here Planet Sea Fishing describe how to a assemble the boom and build a traces using this terminal tackle.
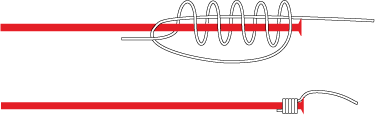
Matchstick booms have been used for many years, particularly on the continent, with the fixed end of the boom generally being trapped within a tightened blood loop. This method however, fixes the boom and does not allow it to rotate sometimes leading to tangles.
To attempt to solve this problem some anglers cut out the perpendicular leg of a three-way swivel and threaded a matchstick or bristle boom through the remaining hole. While this can be effective it is a fiddly job both to prepare the swivel and to tie up the final traces.

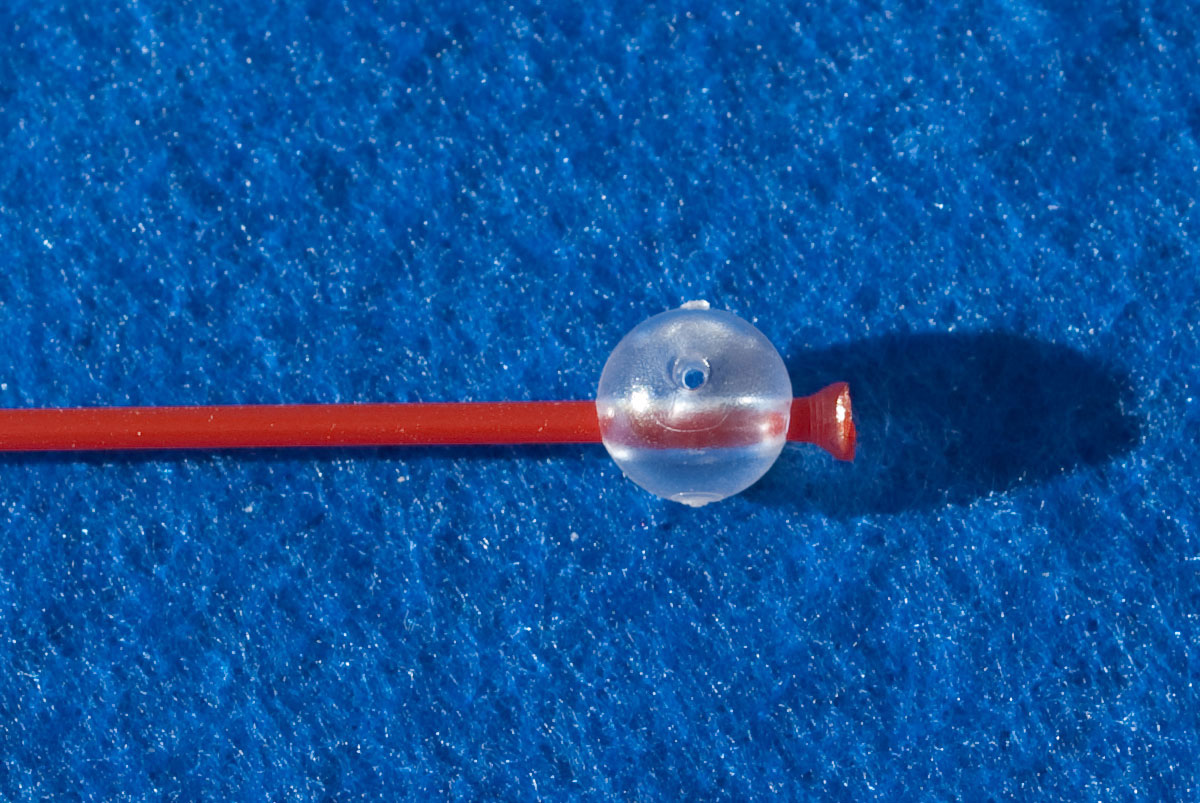
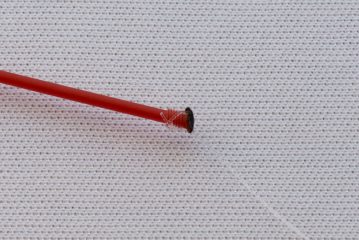
An alternative is to use a pre-formed two-way bead, now readily available both at home and abroad. These beads have two channels running through them and are available in various sizes and shapes for different diameters of line.
The most suitable for the production of bead booms are the round Stonfo Deep beads in sizes 10 and 8 which are available online from Ocean Tackle. Although it is comparatively easy to find nylon matchstick booms in Europe the only source that I am aware of in the UK are supplied by UK Hooks. The white version fits the size 8 Stonfo bead and the red boom is used in the larger size 10 bead.

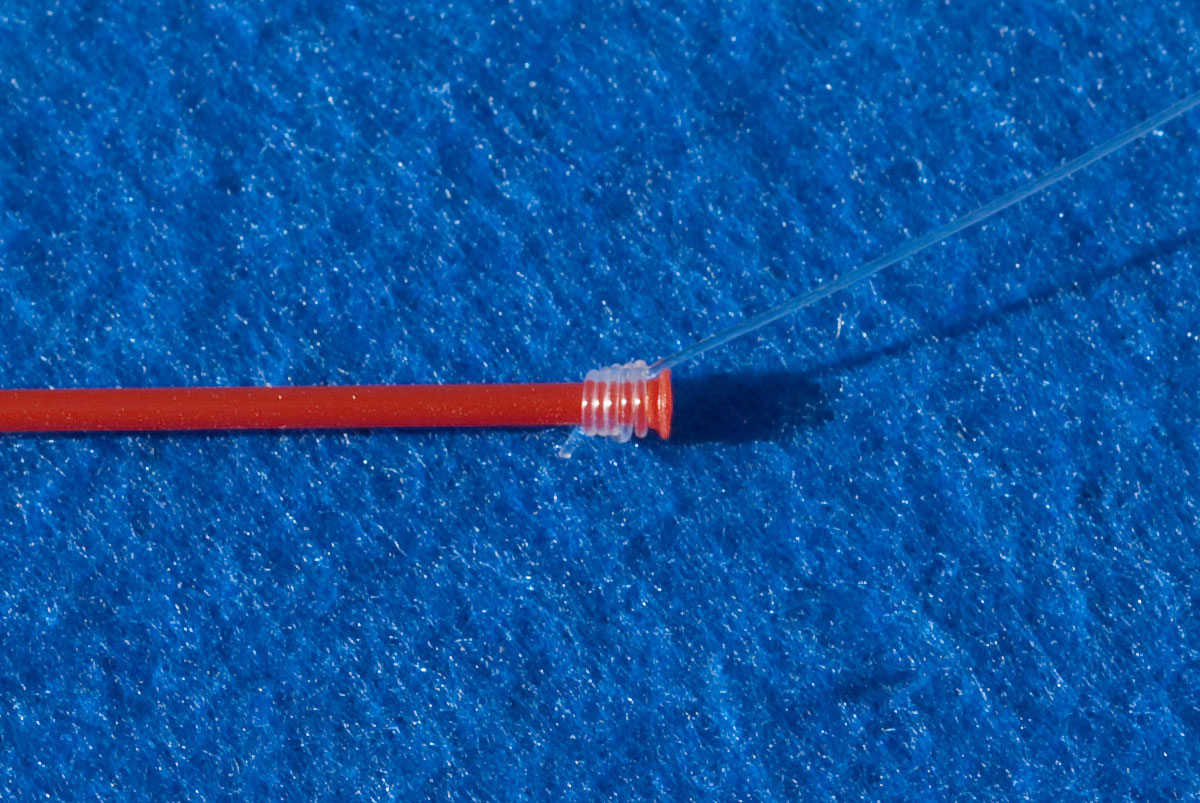
Making the bead boom itself is very straightforward, firstly using a suitable heat source, I prefer a soldering iron, place a blob on one end of the nylon boom. Take care with the hot nylon which can drip if over heated. Thread the bead onto the boom and secure it against the blobbed end using a drop of super glue. Test the chosen booms first with the selected glue as some can attack the boom material, and alternative is to secure the boom against the bead using a short length of tightly fitting tubing.

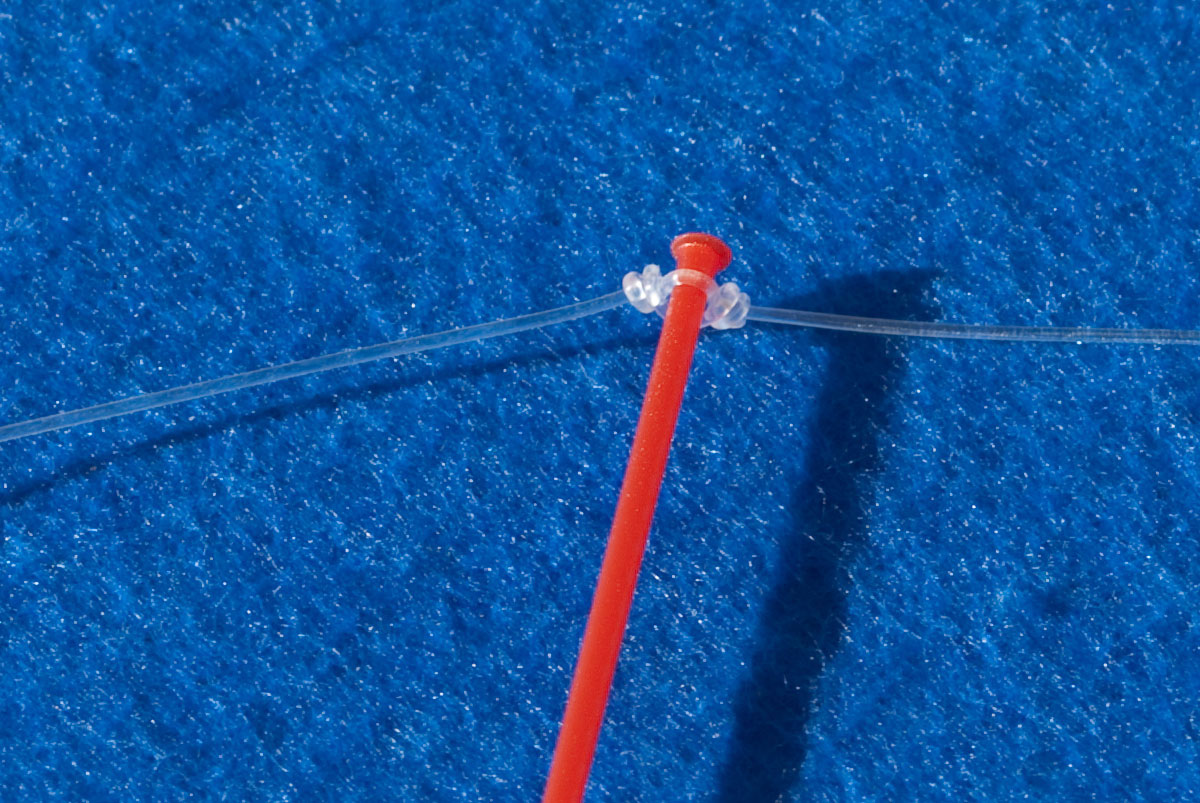
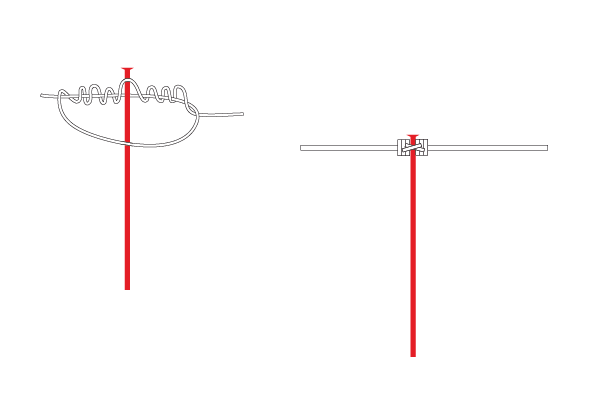
The decision now needs to be made as how the snoods are to be fixed to the boom. The simplest method is to blob the spare end and tie the snood lengths to the boom using a Uni knot. As an alternative a swivel or link can be attached to the free end of the boom.

To do this thread a short length of low temperature shrink tube onto the boom followed by a small swivel. Using round nose pliers bend approximately 15mm of the end of the boom back on itself then slide the swivel up to the bend and locate the shrink tube over the double boom section. A soldering iron allows the selective application of heat to the shrink tubing without affecting the nylon boom.

The construction of the final traces consists of location the bead booms on the rig body line. There are various ways of securing the bead booms in the selected position and the simplest of the these is to use a figure of eight knot above and below the bead. Although this is effective it can be difficult to precisely locate the boom in the required position.


An alternative is to use small brass crimps which allow for precise location of the booms and makes it easy to replicate the dimensions over several rigs. The booms can also be fixed using glued in place beads or short lengths of tubing.
In all these cases a smoother rotation can be obtained by using micro-beads between the bead boom and the fixing method.
Click on image for a larger version
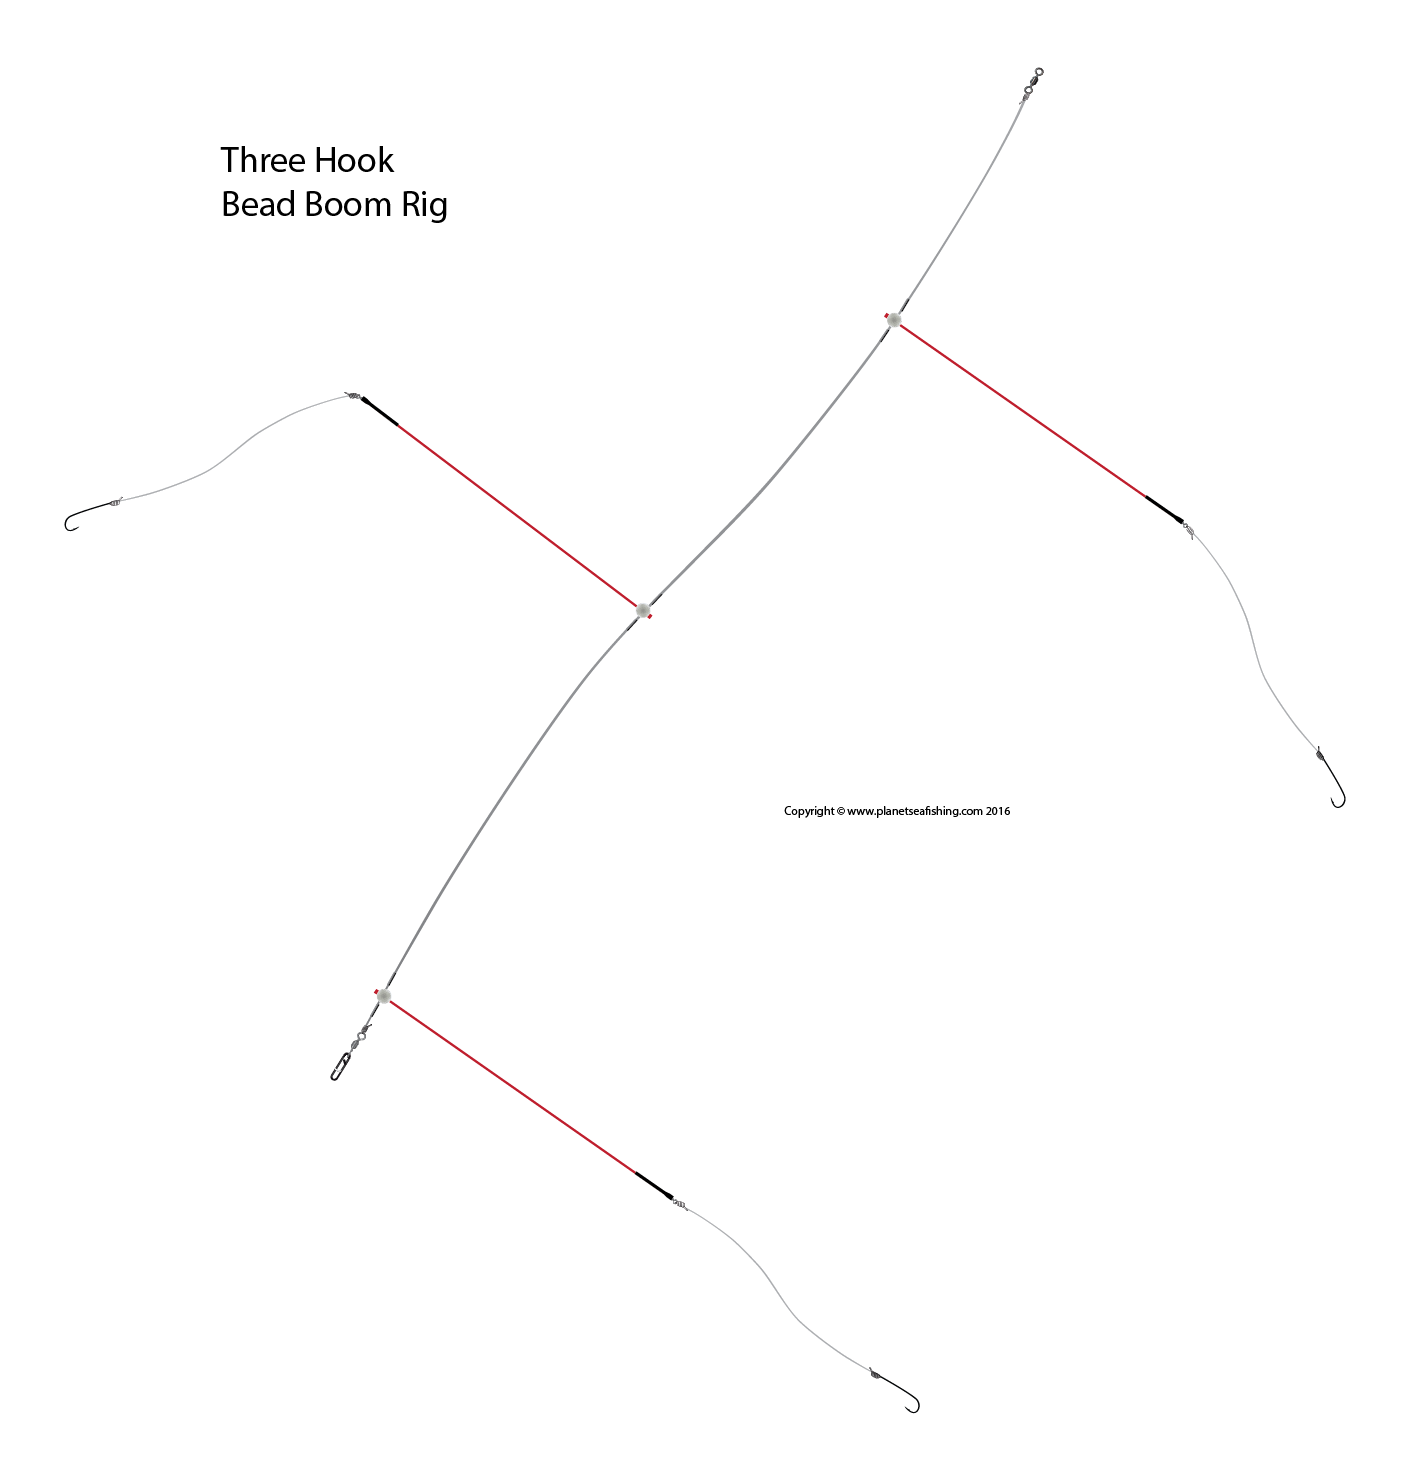
A similar ready made rig is available in the Tronixpro rig range.