Making your mould is the first and probably the most important part in the lure making process. This may seem daunting at first but it is really easy if you follow Alan Banks’ guide.
It is important to take your time to get it right, as it can sometimes be difficult to correct mistakes. The key thing to think about when doing this is, the better the mould the better the end result will be.
There are a few different materials that you can use for making you moulds but by far the easiest and safest to use is RTV (Room Temperature Vulcanising) Silicone. This material usually comes in a two part kit consisting of a white silicone base and a catalyst, which is usually coloured to make it easy to see that you have mixed it correctly. The advantage of using silicone is that it fully cures within 24 hours and is ready to use straight away and can also withstand heat from the plastic. It will make a perfect impression of whatever you pour it over, which can have disadvantages when there are slight imperfections.
STEP 1: Choosing a container
The first step of the process is to find or make a suitable container to make your mould in. You will need something reasonably strong that will not leak and has a flat bottom. You may find various containers around the house that are perfectly suitable, including tupperware boxes, used food containers and even wood. The problem with most plastic containers is that they do not have a totally plain flat bottom so this can restrict how large your lure can be. Also they have quite a large capacity so you will end up using much more RTV silicone than is necessary. Do not use anything made of glass or pyrex, although it looks like it will give a good finish the silicone will stick to it and will be very hard to remove.
Another method that works very well is to make a simple mould box from foam core board. Foam core board basically a piece of stiff foam which is about 6mm thick and has an almost glossy paper on both sides. It is usually sold in craft shops next to where they keep sheets of coloured cardboard and paper. It is also reasonably inexpensive at £3.99 for an A1 sheet from hobbycraft or the Range.

The items you will need to make the box are as follows:
- a sheet of 6mm foam core board
- a hot glue gun
- aluminium foil tape or any strong tape
- a steel ruler (safer to use than plastic when cutting)
- a marker pen
- a Stanley or craft knife
- some metal T pins (used for model making and can be found on ebay)
- some double sided foam mounting tape.
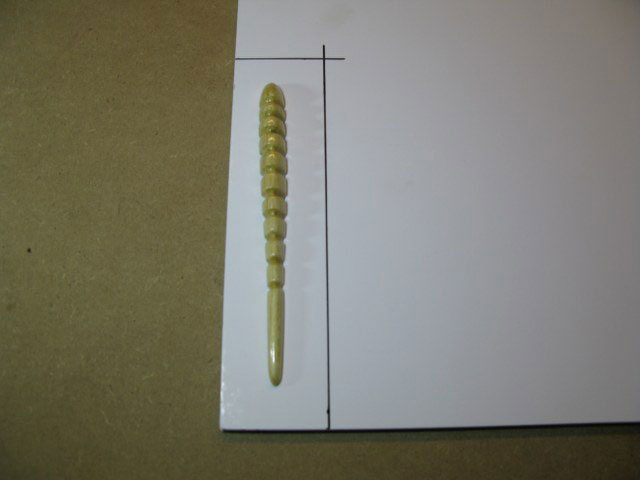
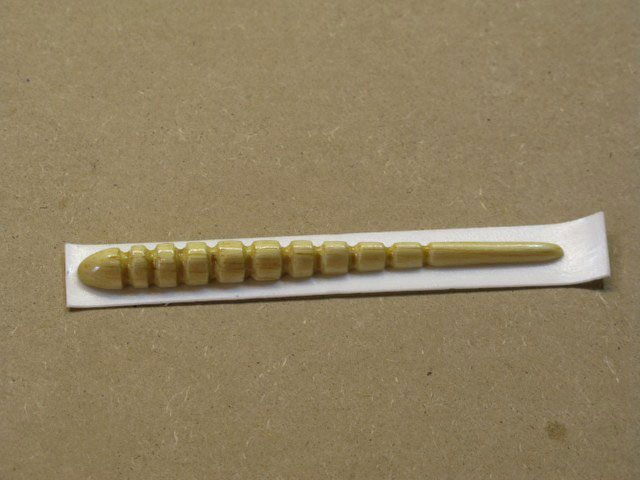
The first step is to decide what size the base of your mould will be. So start by drawing a box around the master that you want to make the mould from. It is important to make allow about 15 – 20 mm around the master as this will ensure that the silicone will hold its shape, any less and you risk the cavity collapsing slightly and an unusable mould. The base that is marked out here is 40mm x 170mm.

Next you need to draw out the sides on the mould box. First thing to do here is measure the lure to the highest point which was about 15mm and add another 15 – 20mm, this gives me the depth of the box.

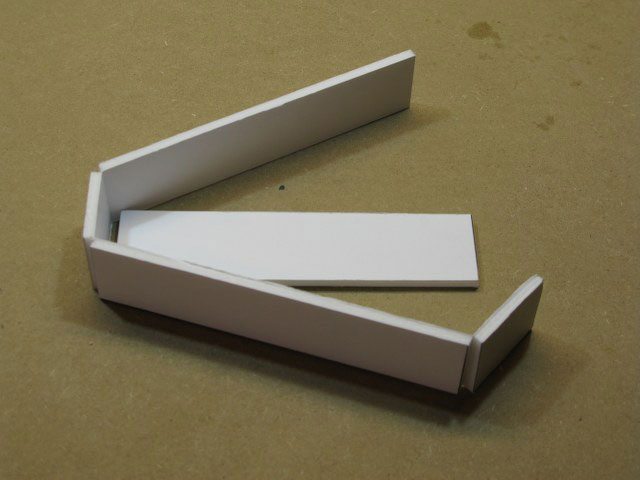
As you can see in the picture a long strip has been marked out with one piece at 46mm then 170mm, 40mm and 170mm all at 35mm high. One of the short sides needs to be 6mm longer to allow for overlap when it is formed around the base.

Next using the steel ruler and Stanley knife carefully cut out the marked parts of the mould box.

Then on the long strip that makes the sides carefully cut along the lines of the corners, but not all the way through leaving one side of the paper intact. When the corners are folded the foam will crack and will leave a hinged corner. This piece can now be folded around the base.

Already you will notice how solid this box feels but to reinforce it and stop any leaks, all edges must be covered in tape. You could use gaffer tape or similar that but the foil tape used here gives a strong finish and is very adhesive.

After this is done it is a good idea to seal the inside edges using the hot glue gun, silicone can get into the tiniest of gaps so this will keep your finished mould quite neat.

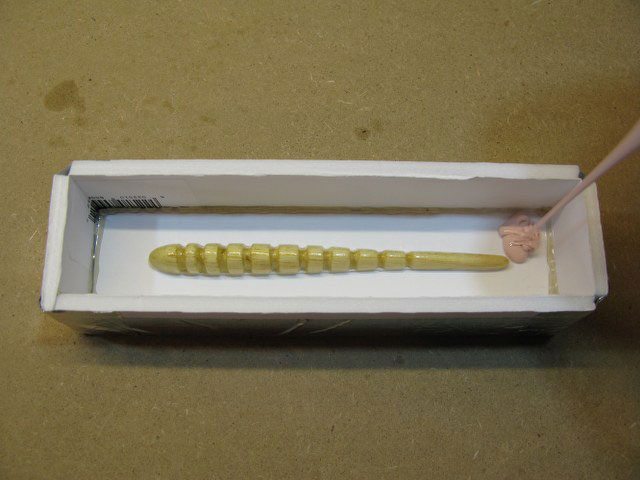
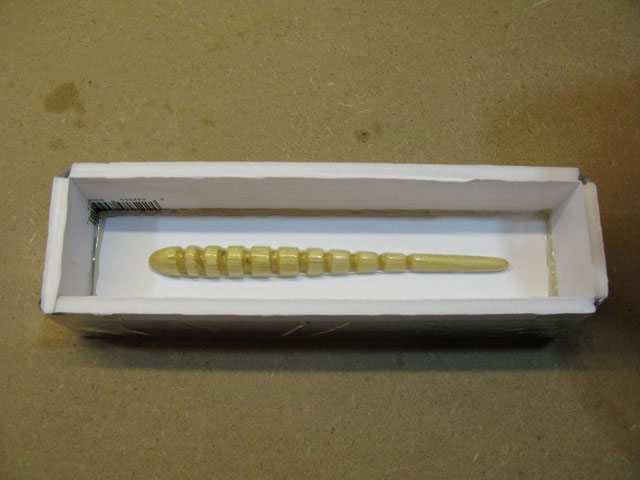
Next step is fixing the master into the base of the box. You could use glue but using double sided foam mounting tape will deal with any imperfections on the bottom of the master and gives a good seal to stop the silicone seeping underneath it in the mould box.

When it is stuck onto the master carefully trim the excess foam tape with a pair of scissors. Then remove the backing tape and stuck it onto the centre of the base. The mould box is complete.
STEP 2: Mixing and pouring the silicone
The next step is to prepare and pour your RTV Silicone into the mould box. Supplies of the silicone can be obtained from Lure Factors website.

A 1.1kg kit as shown here will make about 5 or 6 single moulds or one large multi cavity mould. To avoid wastage and get the most out of the kit you first need to work out the volume of the mould.

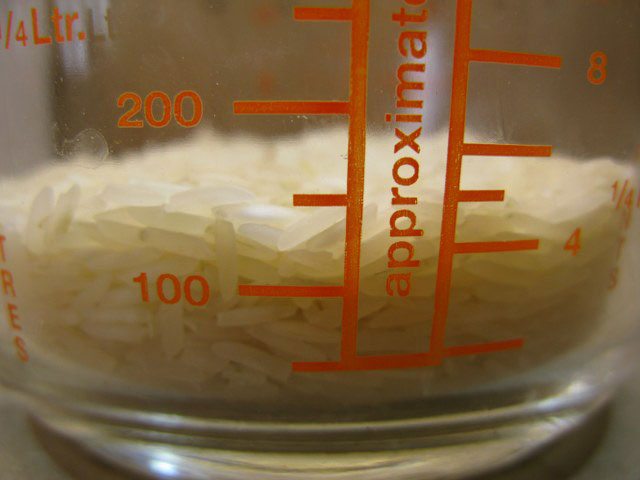
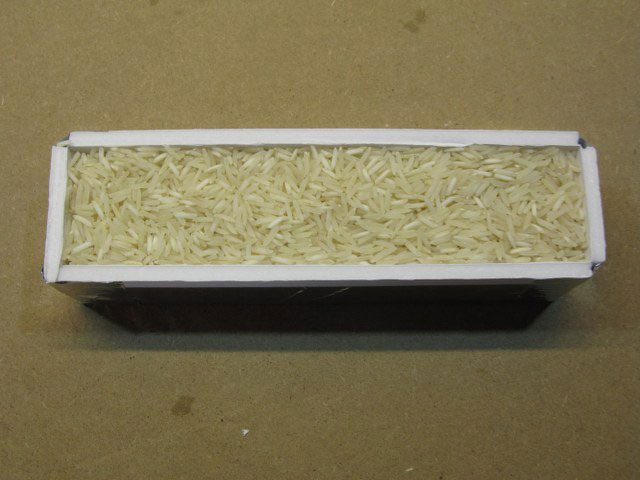
The easiest way to do this is to start by filling the mould with something dry like rice.

The rice can then be poured into a measuring jug to work out the volume. Here you can see it is around 150ml.

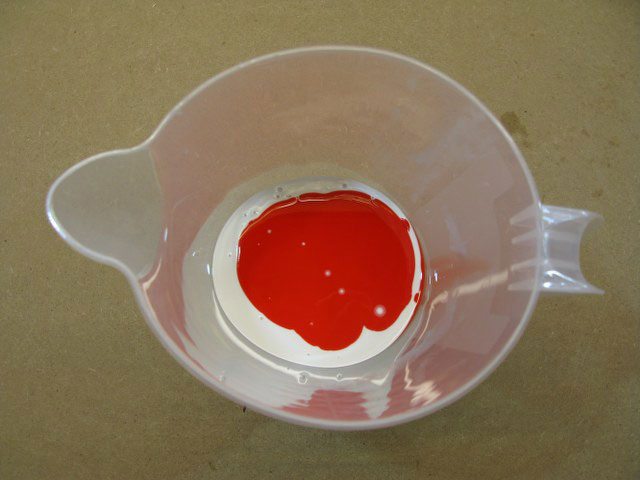
For mixing the silicone use a plastic measuring jug, as any that is left in the jug can be easily peeled off when cured and the jug can be reused. As mentioned before if you use glass then the silicone can stick to it and is almost impossible to remove.
The mixing ratio for this silicone is 10% catalyst to silicone base, either by weight or volume. So pour 150ml of the silicone base into a plastic jug and then add 15ml of catalyst using a measuring syringe.
Then thoroughly mix the two parts together in the jug, making sure that the sides and bottom are scraped and no white base material can be seen through the jug. Try not to do this too vigorously as you don’t want to add too much air and bubbles into the silicone. Mixing can take a few minutes and it is important to make sure it is fully mixed as the silicone may not fully cure if not done right. When done you will start to see the catalyst working as tiny bubbles will form and rise to the top.

It may be a good idea to leave the silicone to rest for about 10 minutes just to let the first bubbles come out of the silicone as most form when first mixed.

Now it is time to pour the silicone into the box. As mentioned before bubbles will form in the silicone and if these end up in the cavity of the mould then they will be noticeable on your cast lure.
Now it is time to pour the silicone into the box. As mentioned before bubbles will form in the silicone and if these end up in the cavity of the mould then they will be noticeable on your cast lure. There are a couple of methods to ensure this does not happen, one of which is to paint a very thin coat of silicone over the master and make sure there are no bubbles in that coat before pouring the rest of the silicone. The only problem with this method is that once you have put silicone on a paint brush it is hard to remove and will need to be binned.
Another method is to slowly pour a very small stream of silicone from height into one corner of the mould box. The small stream will break most of the bubbles as it goes into the mould and as the silicone moves over the master air is slowly pushed out and none is trapped in the detail. This will work perfectly almost every time as long as it is not rushed.

Here you can see the silicone is slowly pouring into one corner. Keep pouring on the same spot until the master is fully covered.

Some fully poured moulds.
Once the silicone is fully poured, gently tap the mould box on a hard surface just to make sure there are definitely no bubbles formed on master. This will make the bubbles rise up and pop at the surface and you will see this happening for a while until silicone begins to set. You can also spray a thin coat of wd40 to break the surface tension and allow the bubbles to pop quicker. It is important as the name says to let the silicone cure at room temperature and also on a level surface, total curing will take about 24 hours. If the silicone is left to cure at colder temperatures, then the cure time will be much longer.
After 12 – 24 hours, check that the silicone is hard and then remove the boxes from around the mould. This can be easily done with the foam board as it can be cut or broken off. The master may stay within the silicone but can be pulled out quite easily. You may find that there is little leakage under the masters but this can be easily trimmed back with a pair of scissors.

The moulds are now ready for use.
Alan’s website has all you need to start making your own plastic lures.
Part 2 details how to pour the lures themselves.